
Table of Contents
Introduction
Royal Mehndi Design represents the top of henna artistry, combining India’s majestic traditions with beautiful intricate patterns. Unlike ordinary mehndi art, these designs have an undeniable sense of grandeur, making anyone who wears them feel truly special. Almost like royalty themselves.
In this comprehensive guide, I’ll take a detailed look into the world of royal mehndi. From understanding what sets these designs apart, to learning the essential tools and intricate techniques needed to create your own designs. You’ll find all the inspiration and guidance necessary to create designs you love.
NOTE
There are infinite possibilities when it comes to Royal Mehndi Designs. This guide is not intended to show you an entire design for your hand or arm. It will show you numerous options for various design elements that can be combined with other elements so you can create an overall design that’s uniquely yours.
You’ll find specific design ideas perfect for every placement, from the palms to the fingertips. We’ve included step-by-step tutorials. Some of these are tailored for intermediate artists but don’t worry if you’re a beginner. Just use our designs as inspiration for yours.
If you’re interested in other types of mehndi then please check out our home page Mehndi Design Gallery.
Understanding Royal Mehndi Designs
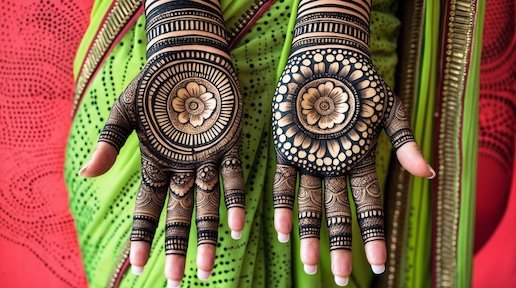
When you hear “Royal Mehndi Design,” you instantly picture something sophisticated, detailed, and incredibly luxurious. Way beyond your “typical” henna patterns. But what exactly makes a mehndi design “royal”? Unlike typical designs, royal mehndi stands out because of its meticulous detailing, extensive coverage, and motifs inspired by royal symbols. Designs like crowns, peacocks, lotuses, elephants, and even architectural details that show the grandeur of India’s historical palaces.

At its core, royal mehndi is all about elegance. The patterns are very detailed, often stretching from fingertips right up to the elbows, creating a stunning, continuous intricate artwork. Negative space is deliberately used to spotlight the delicate complexity like the fine lattice structures, ornate floral motifs, and symmetrical arrangements. Each fine line and precise curve resembles the luxury of lace embroidery, which totally captures that regal feeling.
Royal mehndi isn’t just one cultural style. It combines artistic heritages from all across India. You might find Rajasthani peacock motifs gracefully mixed with Mughal-era florals or geometric jaal patterns. The lotus, symbolizing purity, and elephants, representing strength and nobility, often show up too, adding layers of storytelling and culture. This combination creates something historically rich yet personally unique letting anyone wearing it feel genuinely special.
These days, royal mehndi is gaining popularity among young adults across India. More people are choosing these elaborate designs to make a statement at weddings, festivals, or celebrations. Royal mehndi effortlessly blends tradition and opulence, perfectly matching cultural expression with a bit of personalized extravagance.
Now, having discussed what royal mehndi represents, let’s begin to explore design ideas from our catalog that you can use as inspiration.
Royal Mehndi Designs by Placement
Royal mehndi designs are distinguished not just by their intricate detail but also by their thoughtful placement. The location of the mehndi on your hands or arms can significantly enhance the regal aesthetic and storytelling capability of the designs. Let’s explore the various placements and how each area can uniquely showcase royal elegance and opulence.
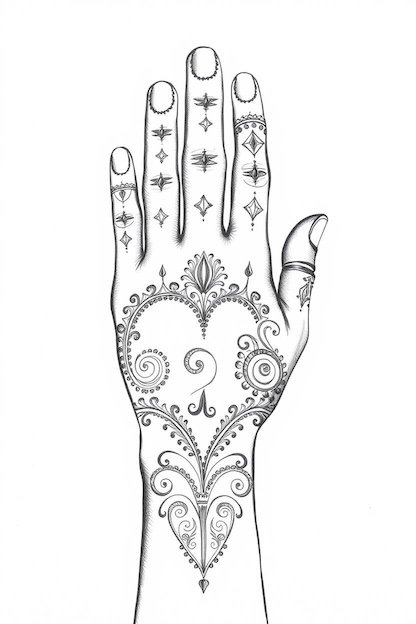
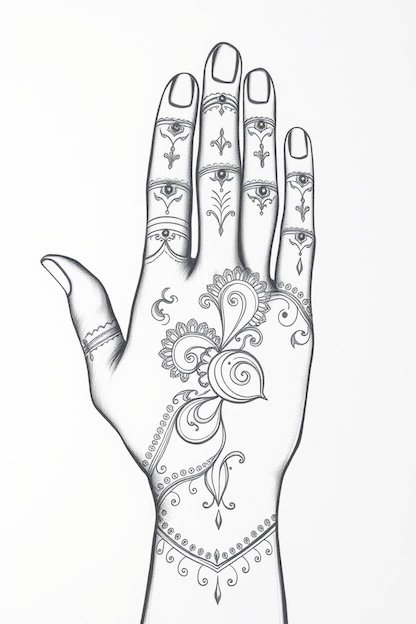
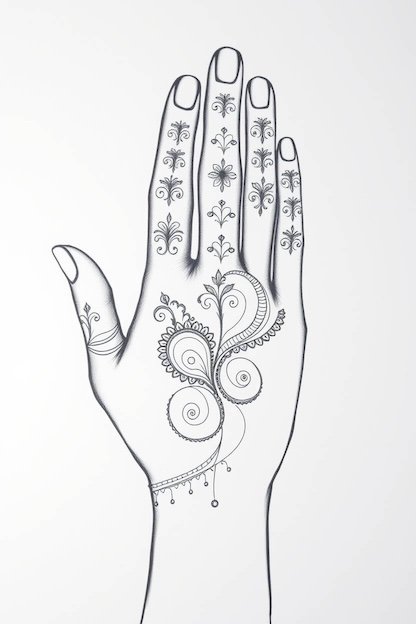
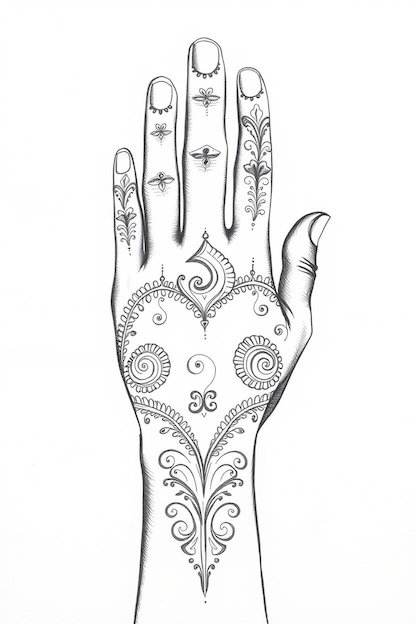
Royal Front Hand Mehndi Design
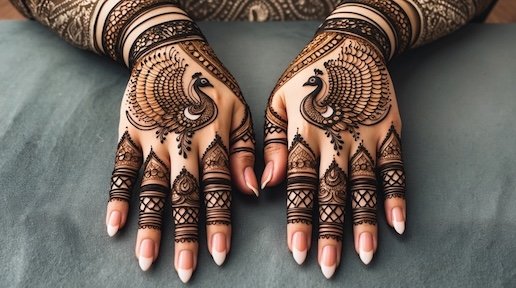
The front hand, especially the palm, offers the perfect spot for grand and elaborate royal designs. It’s here that the most prominent motifs and detailed storytelling elements shine.
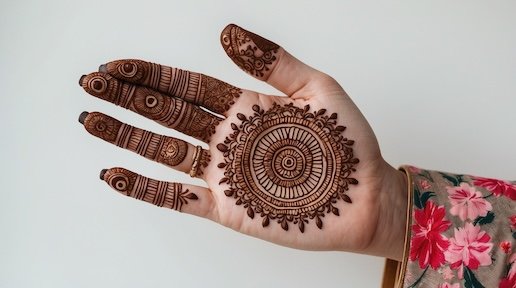
Emphasis on the Palm
Royal palm designs often center around bold, large motifs such as:
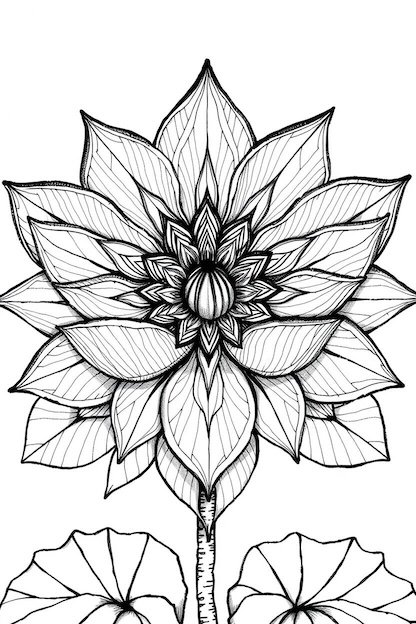
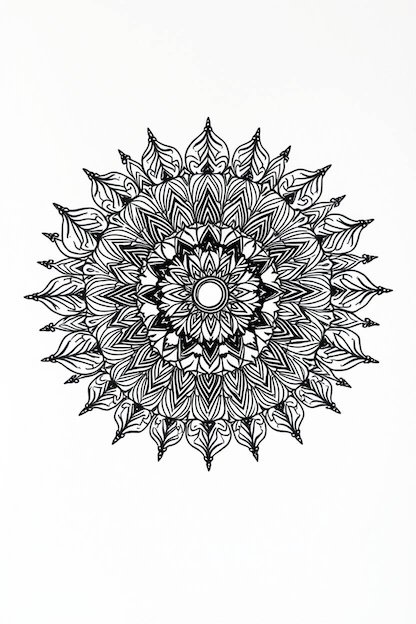
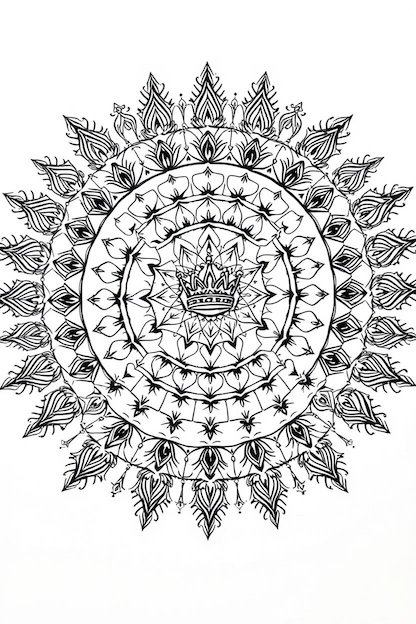
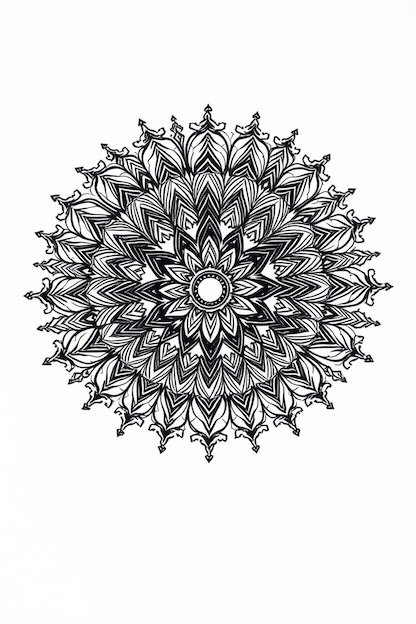
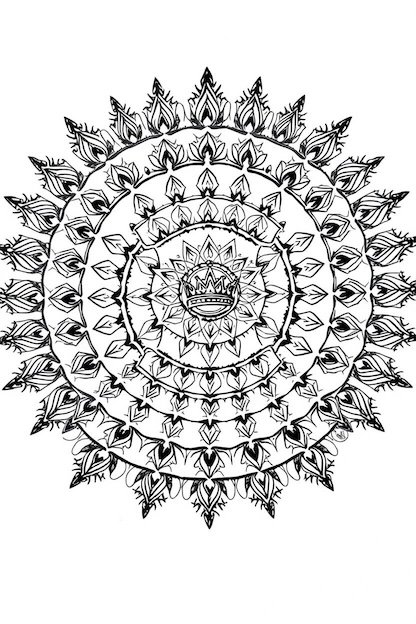
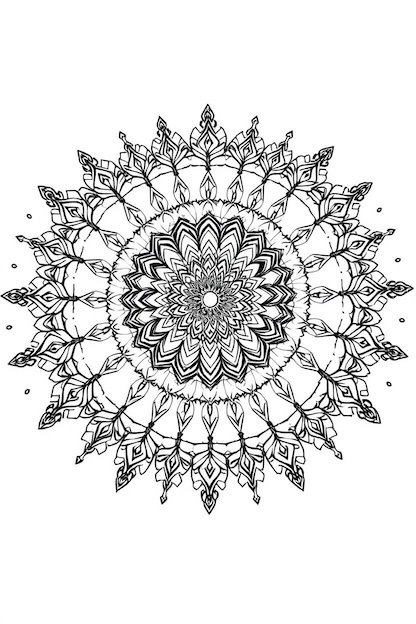
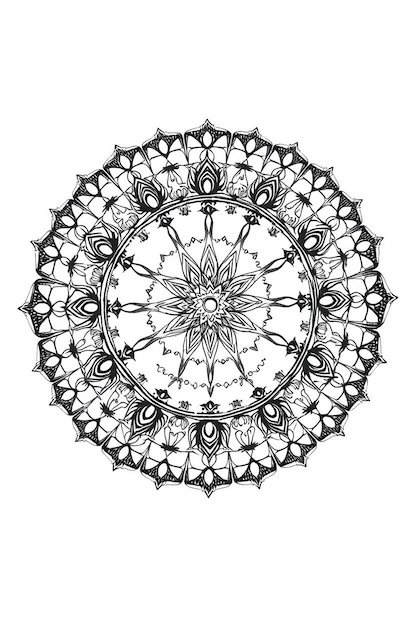
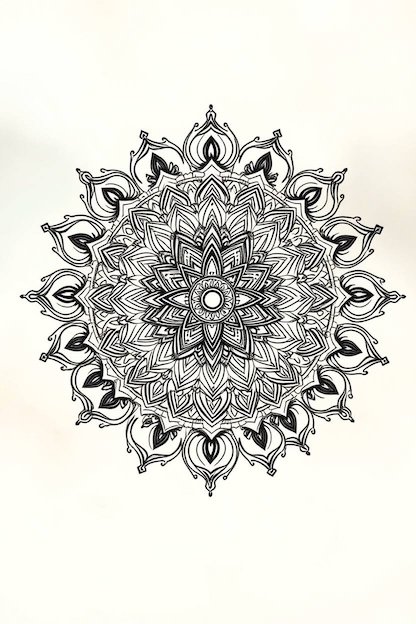
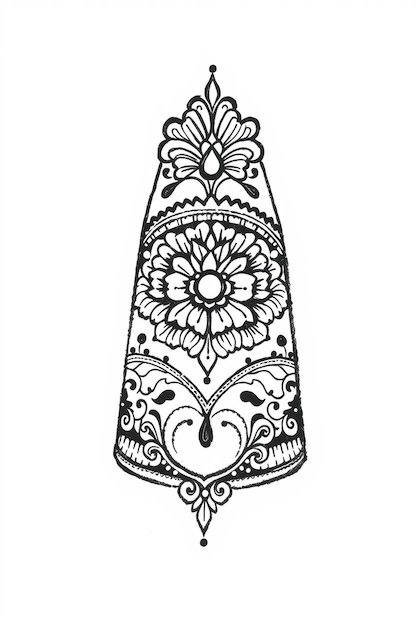
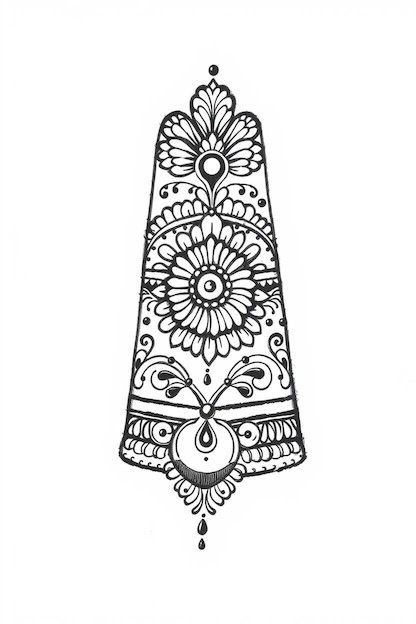
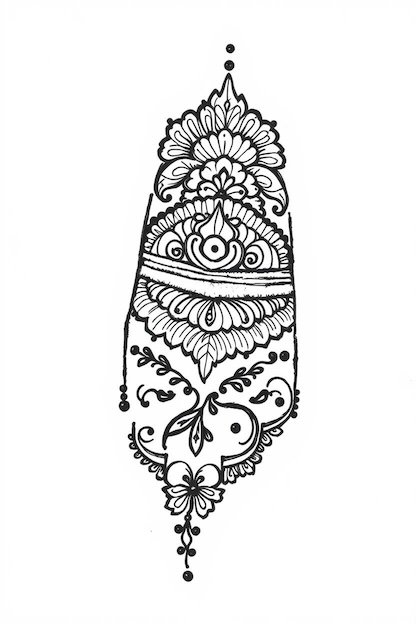
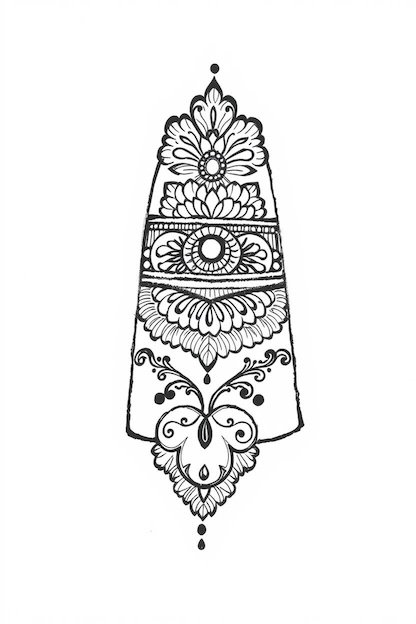
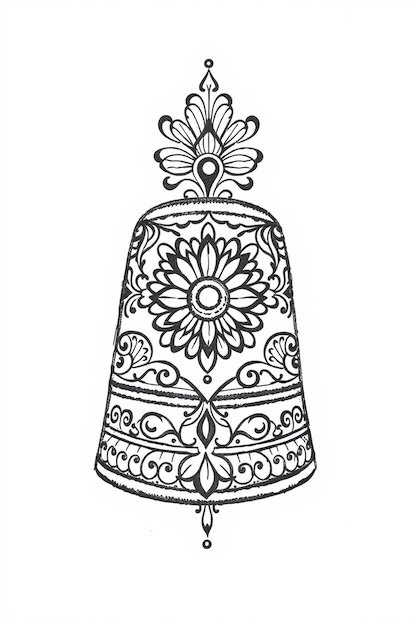
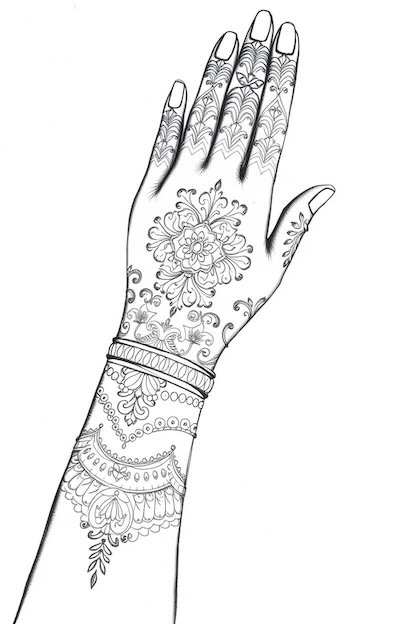
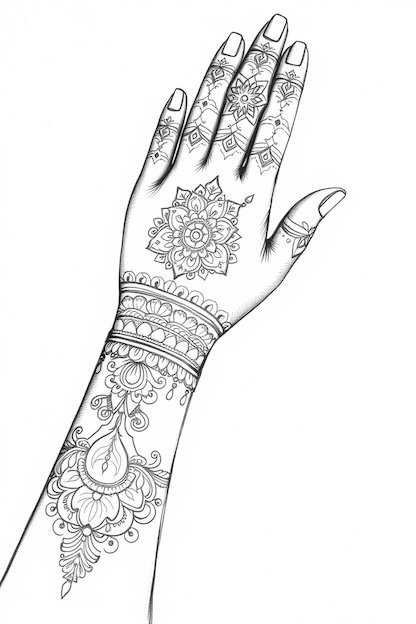
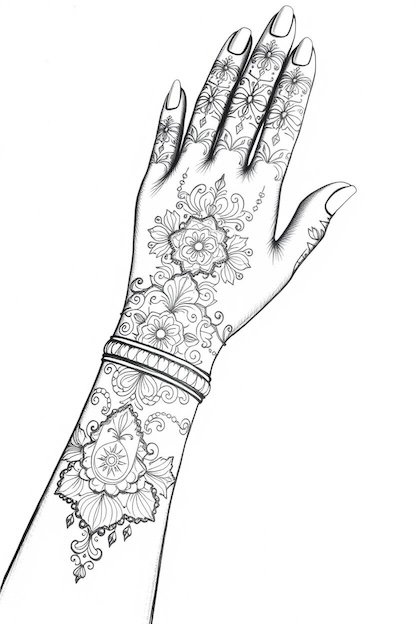
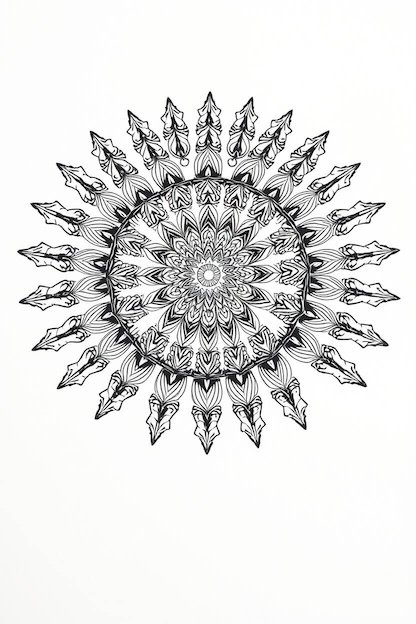
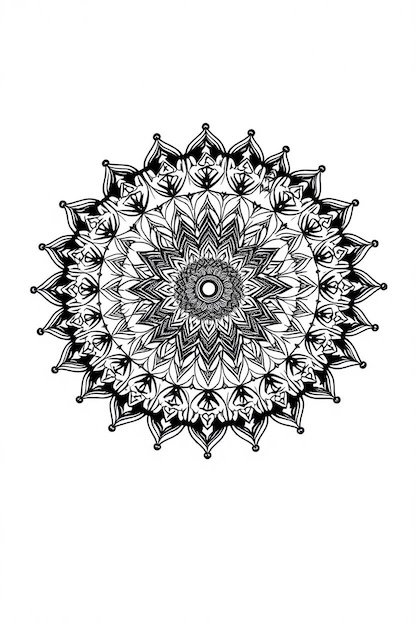
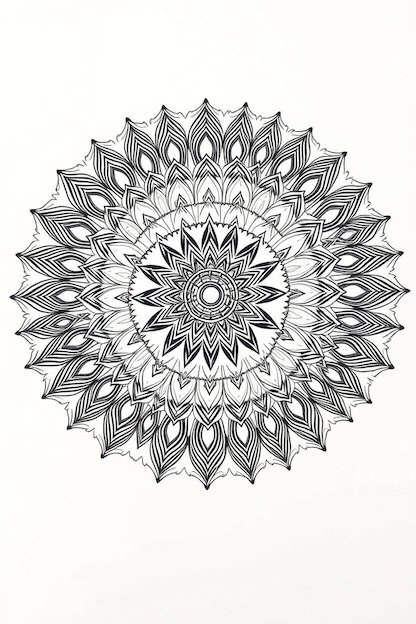
Grand Mandalas: Majestic mandalas filled with multiple layers of intricate details, symbolizing wholeness and harmony. Tiny crowns or jewel-like embellishments can elevate the regal feel.
Below are a few mandala designs from our catalog. These can be drawn as a single design on one palm or split them in half and draw half the design on each palm.

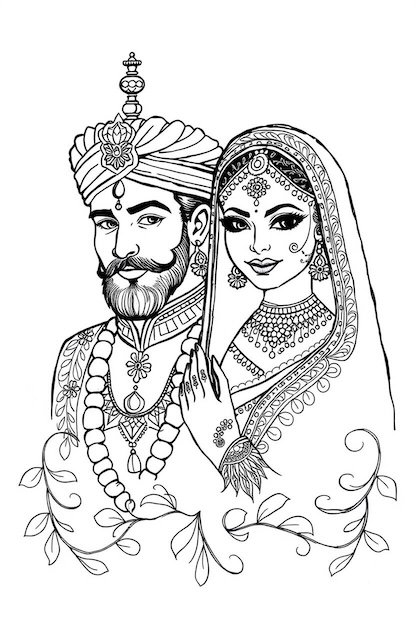
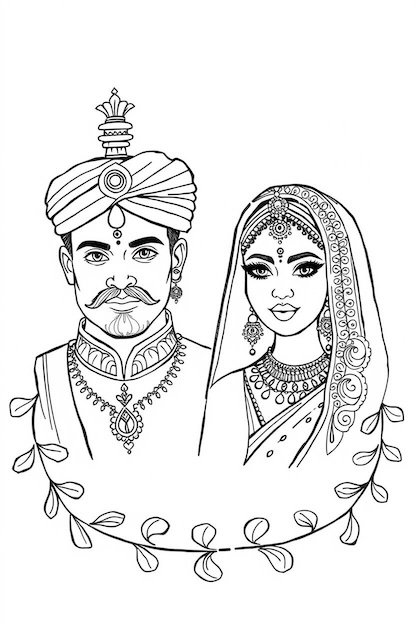
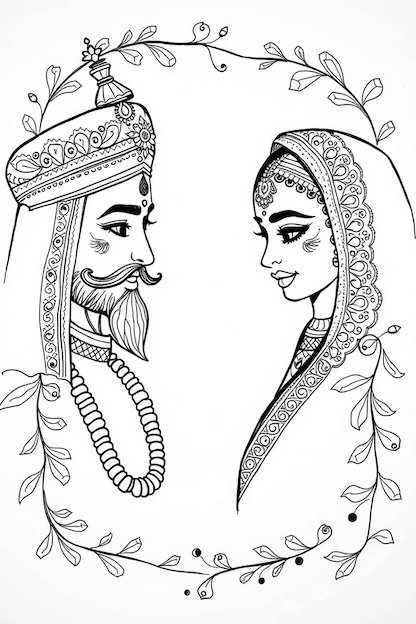
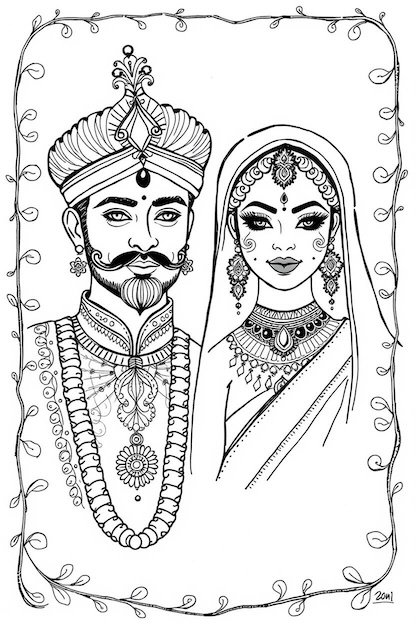
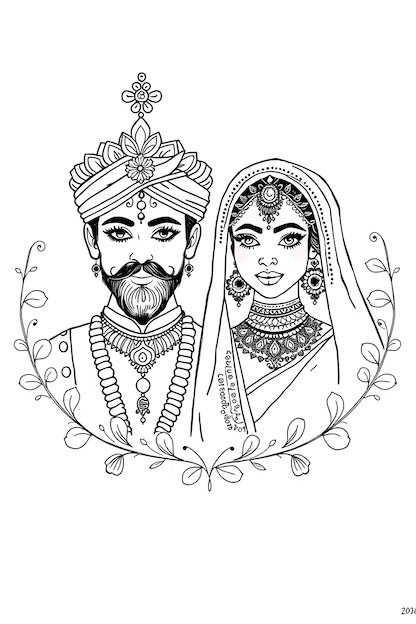
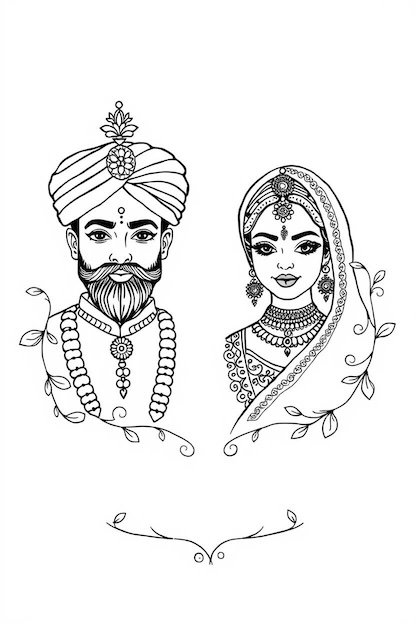
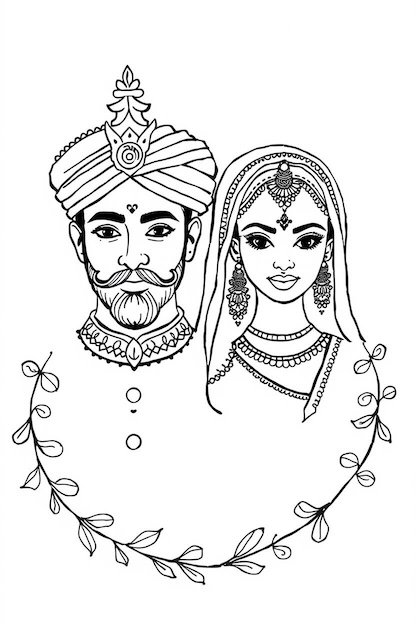
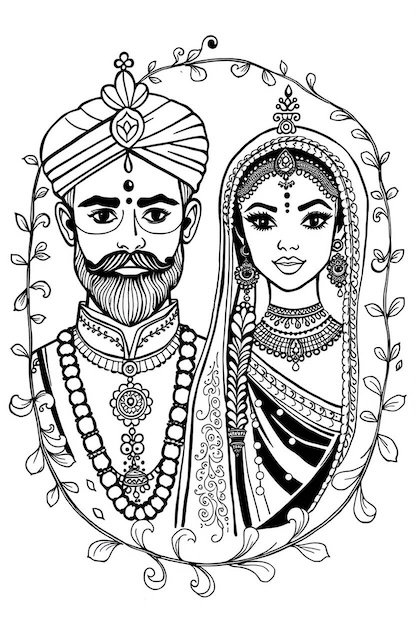
Raja-Rani Portraits: Intricately detailed portraits of a royal couple (king and queen) depicted in ornate attire, symbolizing unity and regal romance. Each hand can represent one partner, creating a stunning visual narrative when the palms are joined. Below are several of our designs that can be drawn together or separated one per hand.
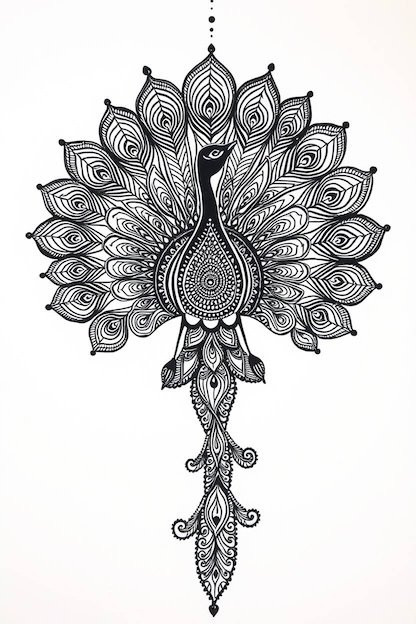
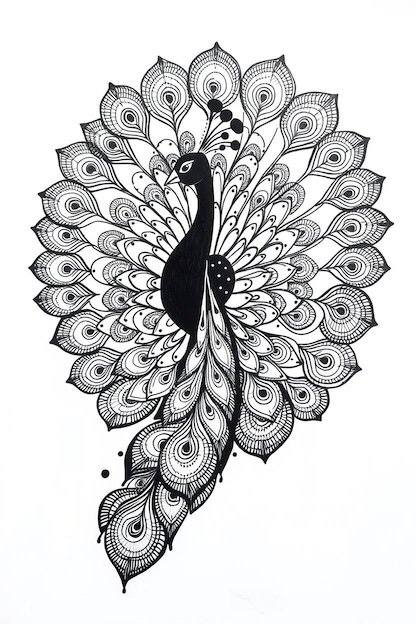
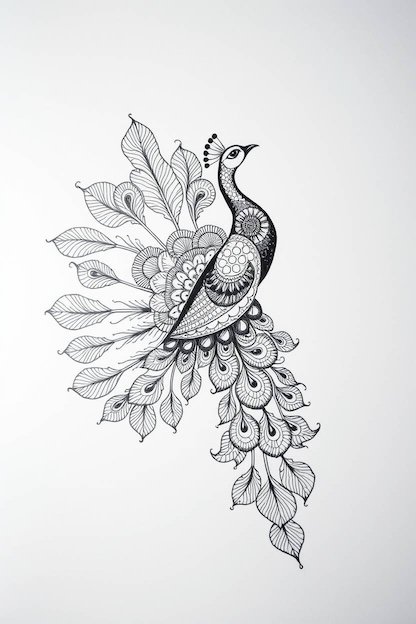
Peacock Motifs: A large, fully fanned peacock placed centrally on the palm radiates grandeur. Its feathers, meticulously detailed with paisleys and dots, become a luxurious focal point.

Filling the Space
In royal mehndi, every inch of skin becomes an opportunity to enhance opulence:
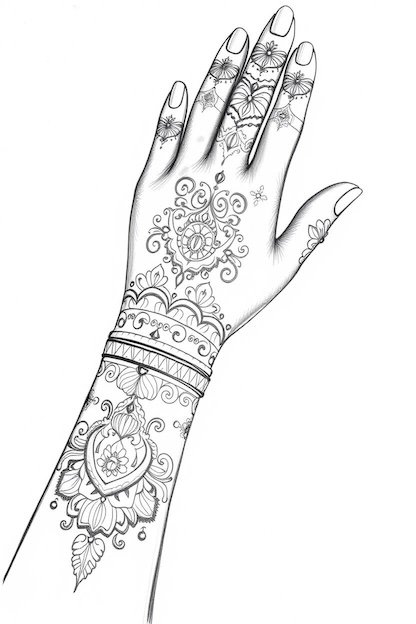
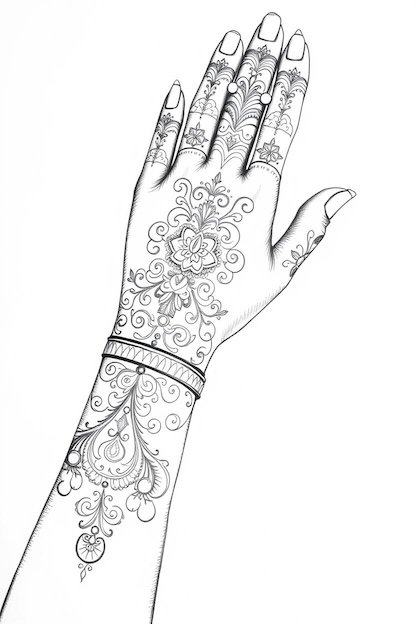
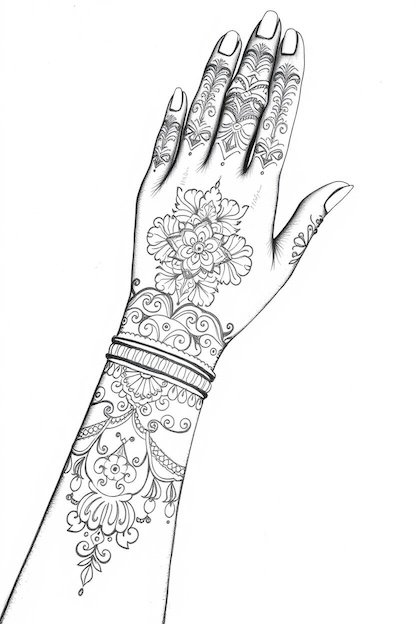
– Fingertips adorned with elaborate patterns or henna “thimbles” create the impression of ornate jewelry. Below are some examples of fingertip designs from our catalog. Use them as they are or choose elements that you like and create something unique.
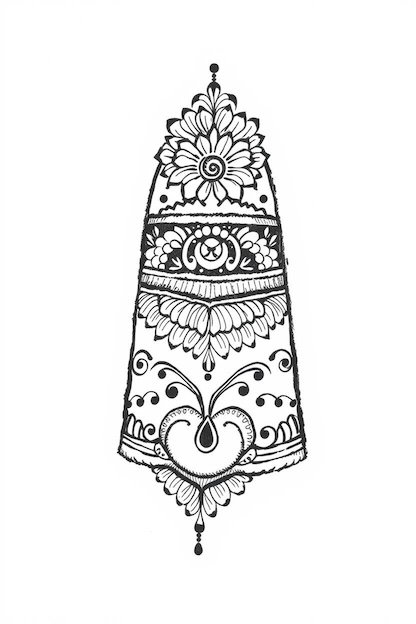
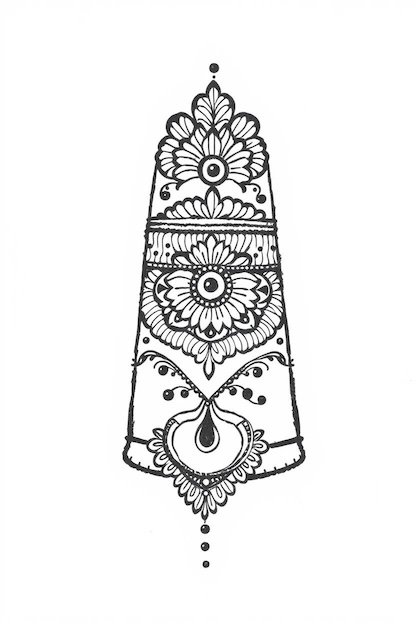

– The central motif typically extends seamlessly into the wrist area with intricate cuffs or bangle-like designs, mimicking elaborate hand jewelry. Here are some sample designs from our collection. If you’re looking for a design for you wrist and arm then copy that part of any of these designs. Look through our website for hundreds of examples of other designs you can pair with these.
Symmetry and Balance
Balanced designs across both hands create harmonious symmetry, enhancing the overall royal effect:
– Paired motifs such as a king on one palm and a queen on the other or two complementary mandalas can tell a cohesive visual story when hands come together.
Edge Detailing
The edges of the palm and fingers may feature lace-like borders or delicate vine motifs, framing the central design beautifully. These subtle yet intricate details are essential in achieving a finished and regal appearance.
Royal Back Hand Mehndi Design

The back of the hand provides a striking canvas for designs that resemble elaborate jewelry or lace gloves, emphasizing elegance and refinement.
Ornamental Glove Effect
Royal designs on the back of the hand often emulate ornate gloves, creating an appearance of sophistication and glamour:
– Central motifs such as regal brooches, intricate lotus blossoms, or graceful peacocks are common focal points.
– Patterns gracefully cascade down each finger and extend elegantly towards the wrist, suggesting delicate lace or luxurious embroidered gloves.
Finger Adornments
Each finger in royal designs is typically lavishly decorated:
– Multiple bands or ring-like patterns on each finger, detailed with intricate dots or tiny paisleys, enhance the luxurious effect.
– Fingertips may feature small mandalas or spiral motifs, adding depth and jewel-like embellishment.
Wrist and Arm Extensions
Designs often flow beyond the hand, elegantly wrapping the wrist and sometimes extending up the forearm:
– Wrist designs often imitate ornate cuffs or bracelets, intricately patterned to resemble royal jewelry.
– Forearm extensions might include royal symbols such as elephants in procession or intricate paisley trails, enhancing the grandeur of the overall look.
Use of Negative Space
Strategically left empty spaces or bold outlined shapes without intricate fills can highlight the complexity of adjacent detailed areas. This approach creates a visually striking contrast, emphasizing the elegance and complexity of royal patterns.
Royal Finger Mehndi Design
Finger-focused designs provide the perfect balance between intricate detail and minimalist elegance, ideal for occasions where subtle sophistication is desired.
Ringed in Elegance
Finger mehndi mimics ornate jewelry, turning each finger into a miniature showcase of royal patterns:
– Parallel bands around each finger create a stacking-ring effect, often filled with delicate patterns or tiny “gem-like” dots.
– Larger ring motifs resembling gemstones or elaborate settings add richness and luxury.
Full Finger Art
Each finger can feature distinct royal motifs, creating an elegant collective impression:
– Individual fingers adorned with miniature royal symbols (crowns, peacock feathers, lotus flowers) create a great looking theme.
– Uniform patterns across fingers, such as detailed chevrons or V-shaped arrangements, create a look of sophistication.
Cuticle and Fingertip Highlights
Modern royal designs often feature subtle yet impactful cuticle adornments, resembling miniature crowns or delicate tiaras at the nail base, enhancing even simple manicures with royal elegance. Solid-filled fingertips further amplify the luxurious aesthetic, possibly embellished with glitter or contrasting white henna for added sophistication.
Royal Groom Mehndi Design
Royal mehndi isn’t just for brides. Increasingly, grooms embrace regal designs, adapting traditional motifs to suit masculine elegance.
Bold and Thematic Patterns:
Groom designs often feature strong, bold motifs like royal emblems or symbolic animals:
– Architectural patterns, majestic elephants, horses, or lions signify strength and nobility.
– Simple motifs like a crown above the groom’s or bride’s initials can be deeply personal and regal.
Masculine Placement:
Grooms usually opt for more restrained but equally impressive placements:
– Designs placed on the back of the hand or forearm often resemble royal emblems or coat-of-arms, enhancing masculinity and dignity.
– Wristbands or forearm cuffs patterned like ornate armor add historical depth and a warrior-like appeal.
Simpler Yet Striking:
Men’s designs tend to incorporate negative space strategically, making each motif stand out boldly. Thicker lines and heavy detailing are common, providing a distinctly royal yet masculine appeal.
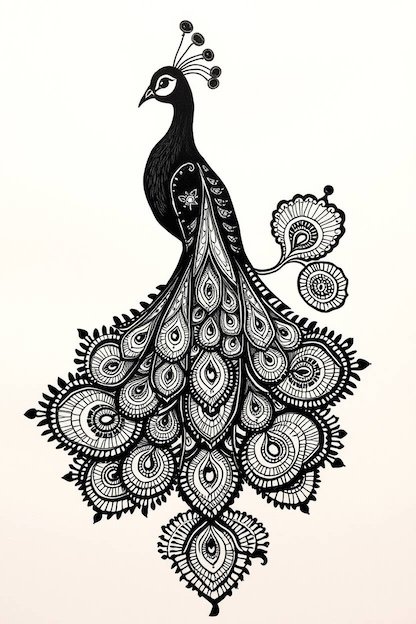
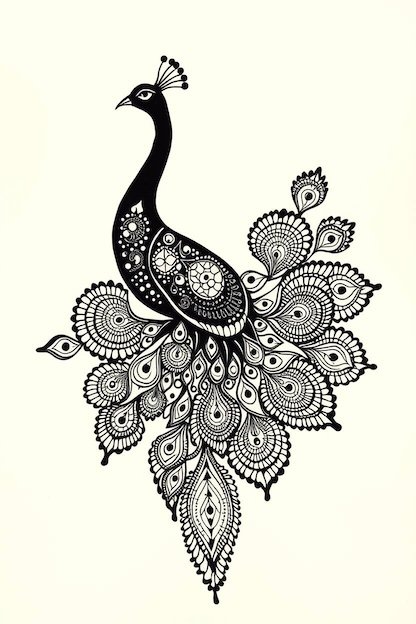
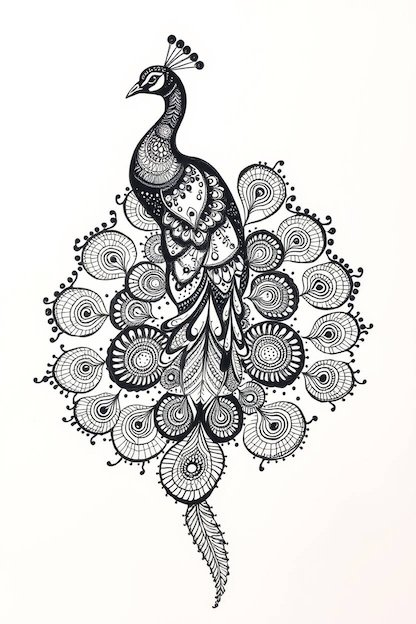
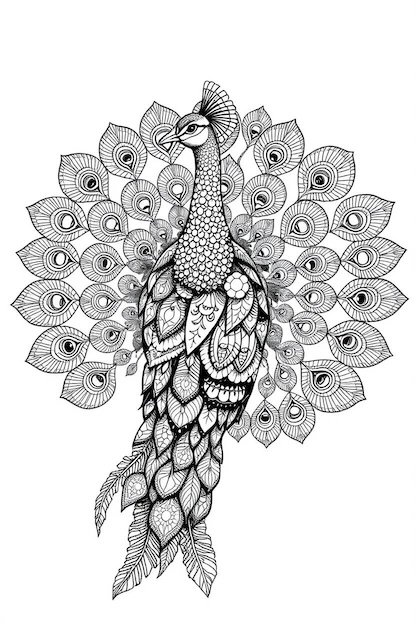
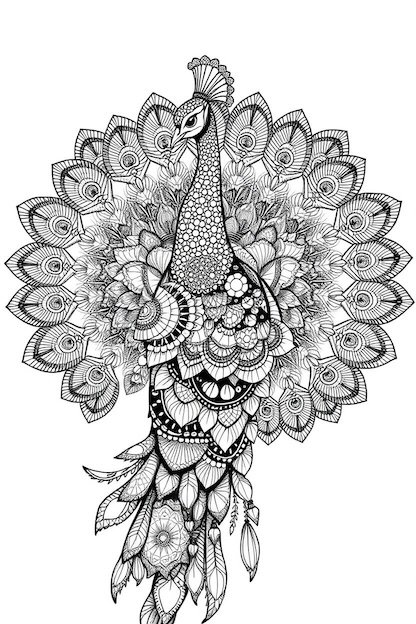
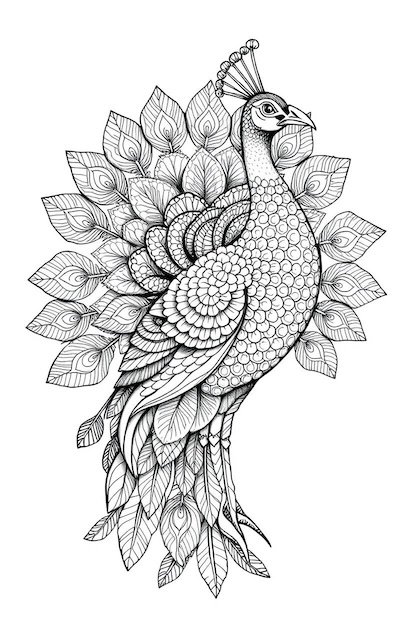
Royal Peacock Mehndi Design

Peacock motifs, emblematic of Indian royalty, are among the most popular elements in royal mehndi, celebrated for their exquisite detail and majestic symbolism.
Peacock as Centerpiece:
The peacock, depicted with its feathers extravagantly displayed, often forms the central motif, instantly adding drama and opulence:
– Full-body peacocks beautifully drape across the hand or arm, feathers meticulously detailed with intricate patterns and paisleys.
– Paired peacock motifs, facing each other or arranged symmetrically, evoke harmony and royal splendor.
Intricate Detailing:
Peacock feathers provide the perfect canvas for showcasing intricate patterns like paisleys, florals and spirals. Each meticulously drawn to mimic the luxurious textures of royal attire.
Placement and Combination:
Ideal for placement on the back of the hand, palm, or forearm, the peacock design can stand alone or integrate with complementary elements like lotus blossoms, floral vines, or paisley swirls, enhancing the overall richness and complexity.
Each placement uniquely emphasizes different aspects of royal mehndi artistry, from grand storytelling on palms to jewelry-like elegance on the back of hands, and regal symbolism in peacock motifs.
Royal Mehndi Designs for Specific Occasions
Mehndi plays an integral role in Indian celebrations, and choosing Royal Mehndi Designs can beautifully amplify the grandeur of any occasion. Here’s how to select regal patterns for weddings, festivals, and cultural events, ensuring your mehndi makes a beautiful statement.
Weddings and Engagements
The Ultimate Royal Occasion
Weddings represent the pinnacle of elaborate, royal mehndi artistry, allowing brides and guests to embody the elegance of royalty. Regal mehndi for weddings often narrates stories or symbolizes deep cultural traditions through elaborate, detailed patterns.
– Bridal Mehndi in Royal Style: Bridal mehndi typically features intricate patterns from fingertips to elbows, and from toes to knees. Popular royal elements include:
- Raja-Rani portraits (king and queen figurines), often placed centrally on palms or forearms.
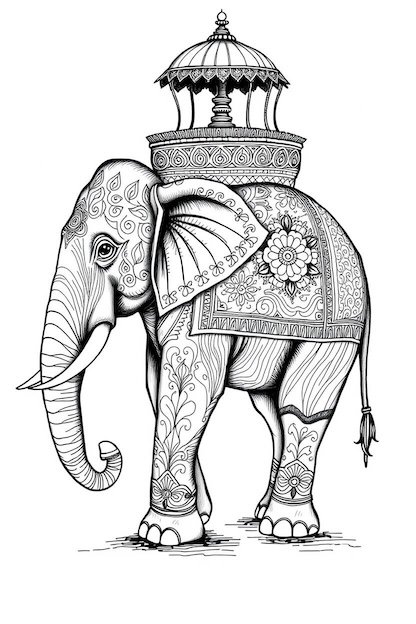
- Wedding procession motifs (baraat), including palanquins (palki), elephants, horses, and ceremonial arches.
- Ornate mandalas and arches, signifying prosperity, unity, and auspiciousness.
For added intimacy, the groom’s initials or name might be cleverly hidden within intricate royal motifs, woven gracefully into the design.
– Engagement Mehndi: Engagement designs might be slightly simpler but equally elegant, often highlighting:
- Ring motifs, symbolizing commitment, encircled by regal patterns like mandalas or floral garlands.
- Event dates or personalized hashtags elegantly scripted within decorative frames.
- Slightly shorter designs, extending up to the wrist or mid-forearm, offering refined elegance suited for pre-wedding celebrations.
– Family and Bridesmaids: Close relatives and bridesmaids often embrace coordinated royal mehndi, opting for simpler yet luxurious elements such as ornate wrist cuffs, smaller palm mandalas, or delicate peacock motifs, creating harmony within the bridal entourage.
Practical Consideration: Due to their complexity, royal bridal designs require meticulous planning and time. Often 4 to 8 hours for bridal mehndi. Ensure you select a skilled artist or allocate sufficient practice if applying yourself.
Festivals
Festivals like Diwali, Eid, Karva Chauth, Teej, and Navratri present wonderful opportunities to adorn royal mehndi designs. Although festival mehndi typically isn’t as extensive as bridal, adding royal touches enhances the celebratory spirit.
– Diwali (Festival of Lights): Incorporate symbolic elements like diyas (oil lamps), intricately patterned floral vines, and elaborate firework bursts. Embrace symmetrical and rich patterns, perhaps accentuated with gold glitter or metallic paints to mirror festive brightness.
– Eid: For Eid, royal mehndi can feature geometric patterns combined with moon and star motifs. An intricate crescent moon, surrounded by dense mandalas or floral embellishments, beautifully reflects the spirit of Eid celebrations.
– Karva Chauth: Popular royal motifs for Karva Chauth include silhouettes of women observing the moon, bridal portraits, and ornate floral vines symbolizing marital harmony and devotion. Such scenes are framed elegantly in rich, dense patterns.
– Teej and Monsoon Festivals: Incorporate festive motifs like swings, monsoon-themed leaves, or Shiva-Parvati imagery, meticulously detailed to capture the lush essence of the rainy season celebrations.
– Navratri and Garba Celebrations: Patterns reminiscent of Garba attire—like detailed mirror-work simulations, ornate paisleys, or decorative crossed dandiya sticks—can be captured beautifully in henna, elevating the festive attire to a royal standard.
Practical Tip: For festivals, consider practical designs focused on either the front or back of hands. Balancing decoration with functionality (allowing ease for festival activities like cooking or rituals) ensures your design remains elegant yet comfortable.
Cultural Celebrations
Royal mehndi can be a powerful expression of heritage and pride during cultural festivities, anniversaries, family milestones, or themed events. Here’s how to personalize royal designs for various cultural contexts:
– Regional Celebrations: Embrace region-specific motifs
– Rajasthani celebrations could feature royal palaces, elephants, or intricate jharokha (window) designs.
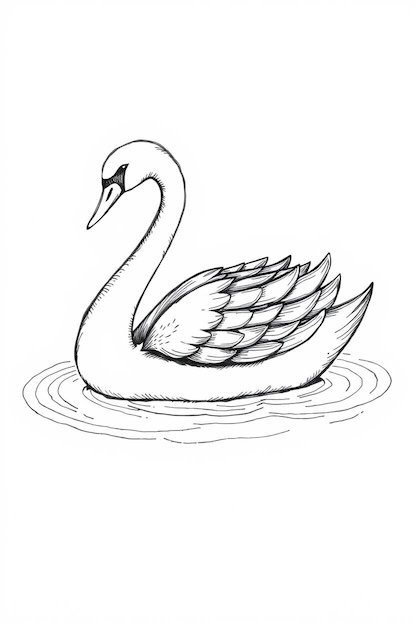
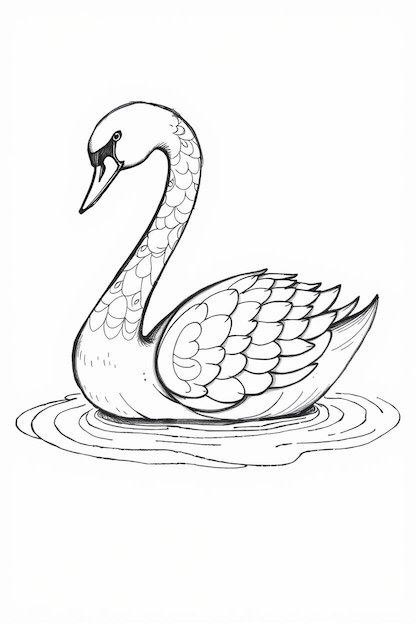
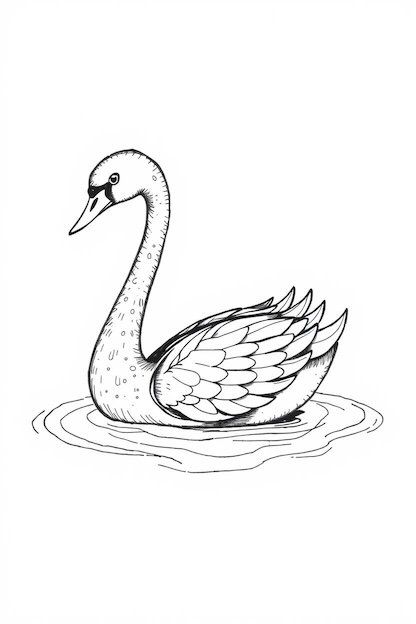
– South Indian events might highlight ornate temple designs, swans, or motifs from classical dance traditions.
– Anniversaries & Family Milestones: Special occasions like wedding anniversaries can be commemorated with royal motifs signifying union, such as intertwined peacocks or customized numerical emblems. Baby showers could include miniature crown motifs or cradle designs detailed elegantly to celebrate the royal arrival.
– Traditional Dance Performances: Classical dancers can adorn hands and feet with bold sun or lotus motifs visible during performances, mimicking traditional alta but in elaborate royal henna patterns, enhancing stage presence.
– Community Gatherings: At cultural fairs or community events, henna art can reflect collective pride. Designs might blend traditional and royal styles, such as detailed floral Arabic patterns enhanced with royal Indian motifs like mandalas or peacock feathers.
Practical Advice: Cultural events may vary in formality so adjust your royal design’s complexity accordingly. Grand designs for formal events and simpler yet elegant motifs for daytime events.
Choosing royal mehndi designs for specific occasions allows you to express cultural pride, personal style, and festive joy, turning each event into a memorable celebration.
Popular Motifs in Royal Mehndi Designs
Royal Mehndi Designs stand apart because they weave cultural symbolism, intricate artistry, and regal elegance seamlessly into their patterns. Below are some iconic motifs commonly used in royal mehndi, each enriching your design with both aesthetic appeal and deeper symbolic meanings:
Peacock
Peacocks epitomize royalty, grace, and beauty. Their feathers, depicted with meticulous detail, often incorporate paisleys, dots, and intricate scallops. Whether placed centrally or integrated subtly throughout a design, peacocks add immediate beauty. Brides often choose dual peacock motifs, representing romantic unity, enhancing their bridal mehndi with symbolism of eternal companionship and regal charm.
Lotus
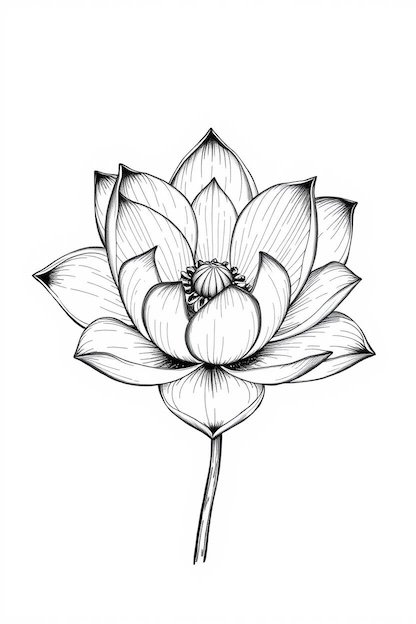

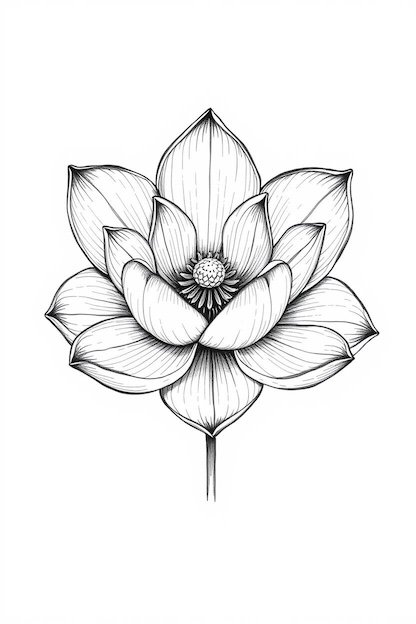
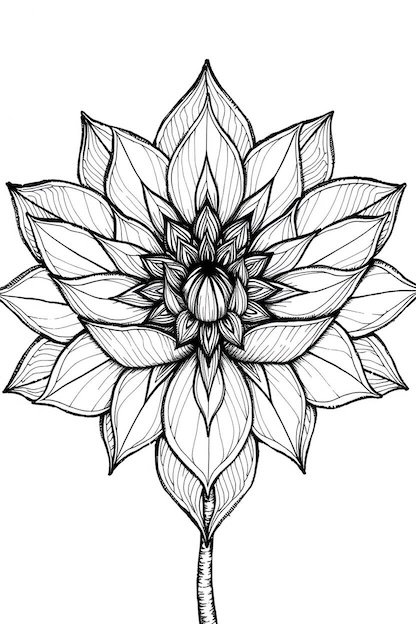
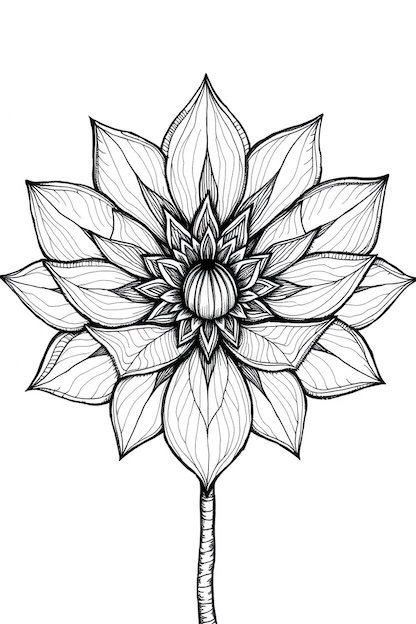
The lotus symbolizes purity, divinity, and spiritual awakening. In royal mehndi, the lotus is often portrayed as elaborate multi-layered petals, either as a central motif or recurrent smaller elements. This majestic flower not only beautifies the design but also represents auspiciousness, prosperity, and the regal aesthetics seen in palatial decor and traditional Indian artistry.
Elephant with Howdah
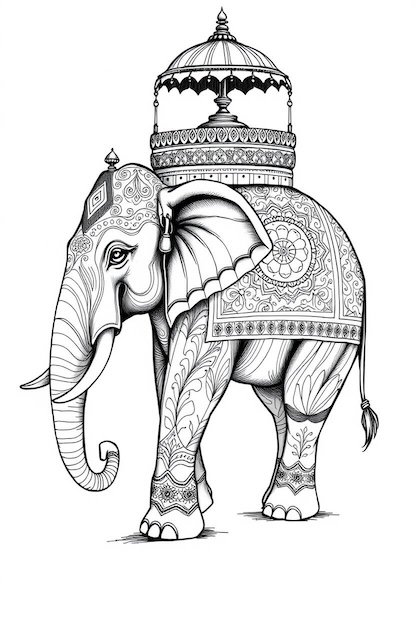
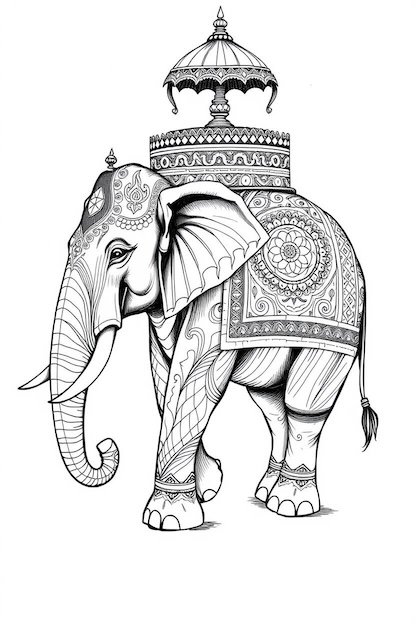
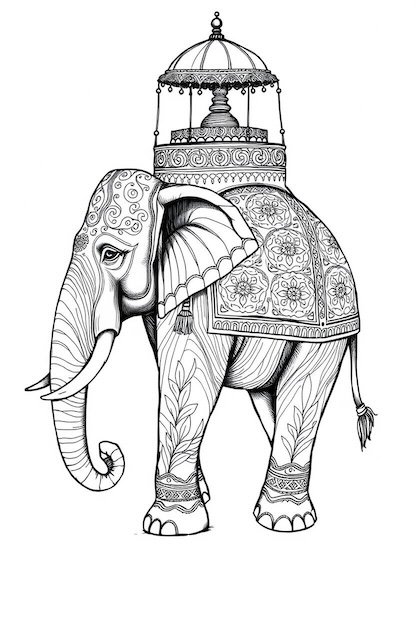
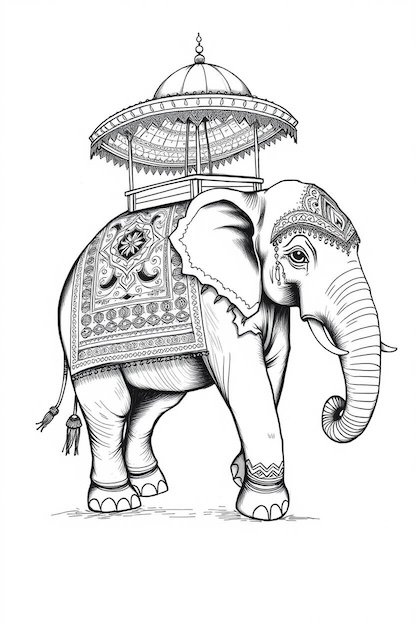
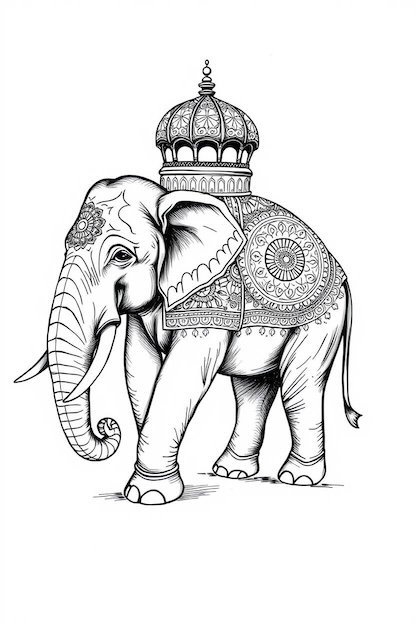
Elephants, powerful symbols of strength, royalty, and prosperity, frequently appear in regal mehndi designs. Drawn with a decorated howdah (ceremonial seat), this motif symbolizes grandeur and ceremonial prestige. Often used in wedding mehndi, an elephant can be depicted carrying figurines of the bride and groom, narrating the story of a royal procession on a significant life event.
Paisleys (Mango Shape)


Paisleys are classic motifs in mehndi, symbolizing fertility, abundance, and luck. Royal designs elevate paisleys by nesting smaller paisleys within larger ones or creating detailed paisley chains forming ornate borders. Their versatility makes them ideal as connecting elements, effortlessly linking larger motifs like mandalas or crowns, creating a harmonious and luxurious tapestry of design.
Mandalas and Circular Patterns
Mandalas symbolize unity, completeness, and cosmic harmony. In royal designs, mandalas are often sophisticatedly intricate, embellished with scalloped borders, sun rays, or regal detailing like miniature crowns. Central mandalas placed on palms or back of hands serve as powerful focal points, showcasing meticulous artistry and amplifying the regal impression.
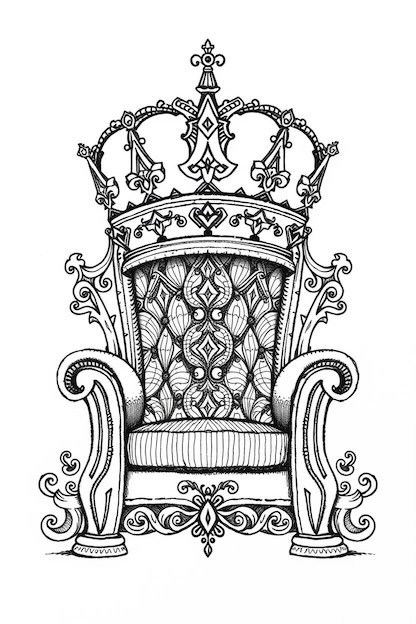
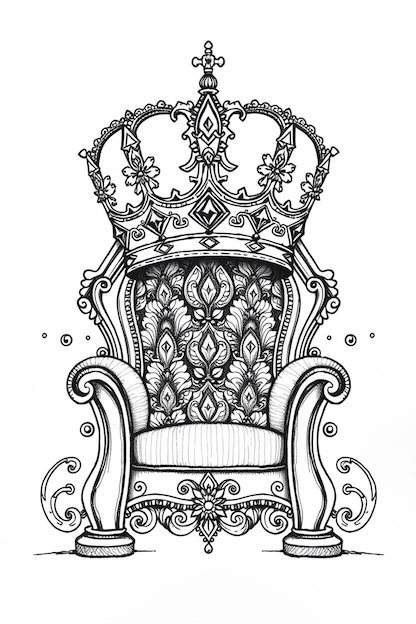
Crowns and Thrones
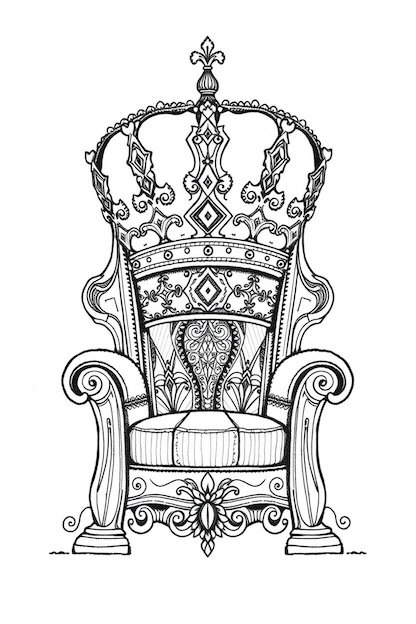
Explicitly royal symbols like crowns, thrones, or regal insignia bring a modern twist to mehndi designs. A small crown placed strategically, such as above initials or central motifs, instantly signifies royalty and celebration. Similarly, thrones or royal seating motifs creatively positioned convey authority and grandeur, perfectly suitable for weddings or regal-themed events.
Architectural Elements
Royal palaces and Mughal-inspired architecture significantly influence mehndi designs. Elements like arches, domes, jharokha (decorative windows), or even chandeliers intricately drawn in henna replicate the splendor of royal courts.
Floral and Vine Motifs
Floral elements like roses and jasmine symbolize beauty, prosperity, and elegance. When combined with ornate vine patterns, these motifs create lush, abundant designs, reminiscent of royal gardens or palace embroideries.
Animals and Birds
Apart from elephants and peacocks, royal designs may occasionally incorporate other symbolic animals:
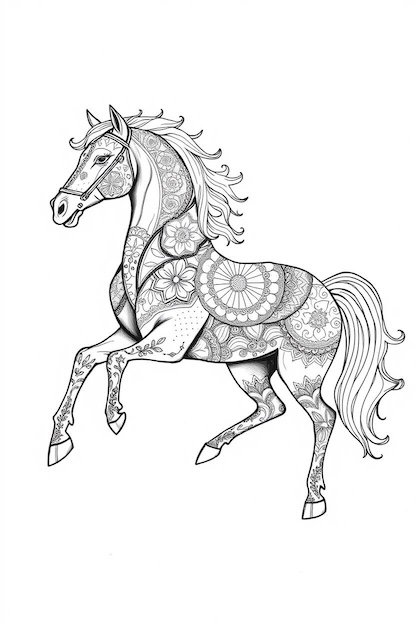
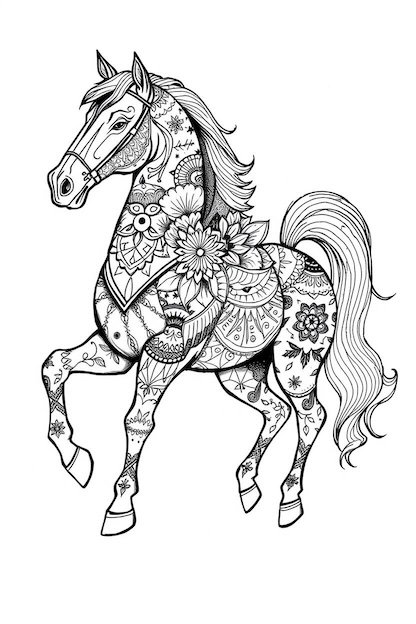
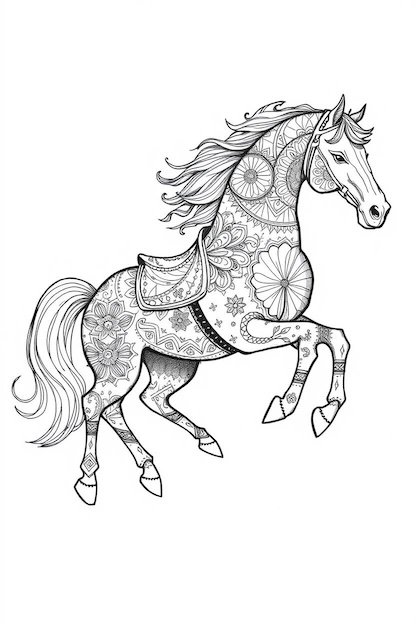
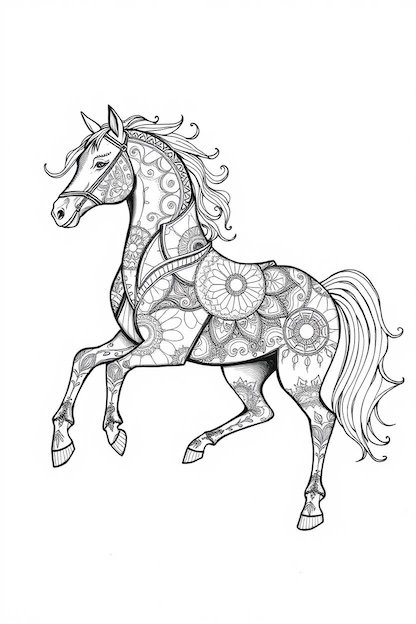
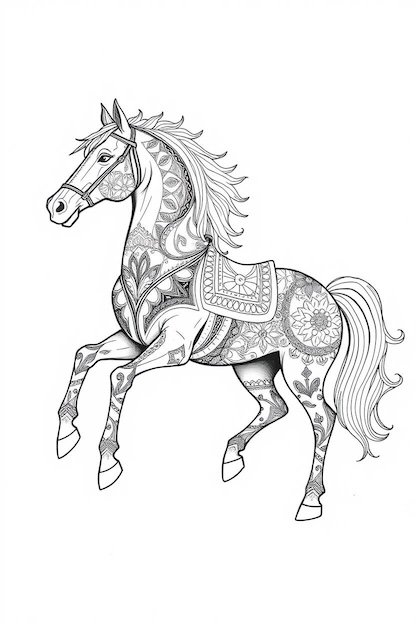
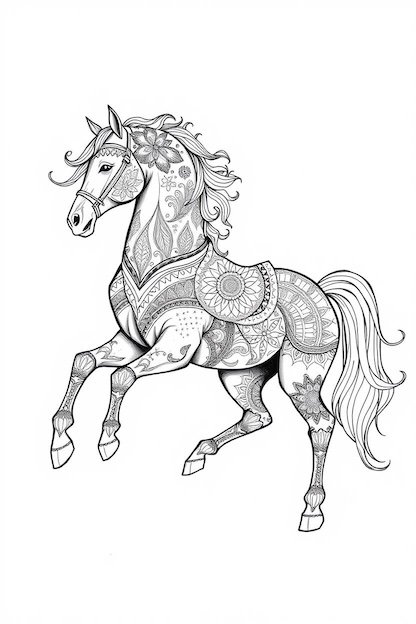
– Horses: Representing nobility, strength, and valor, ideal for groom mehndi.
– Swans: Denoting elegance, purity, and grace, often complementing feminine royal designs.
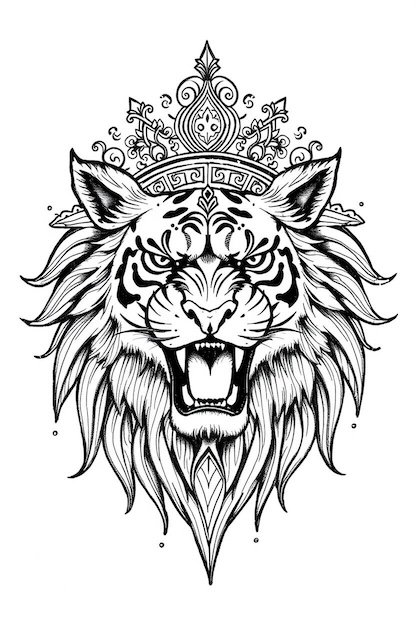
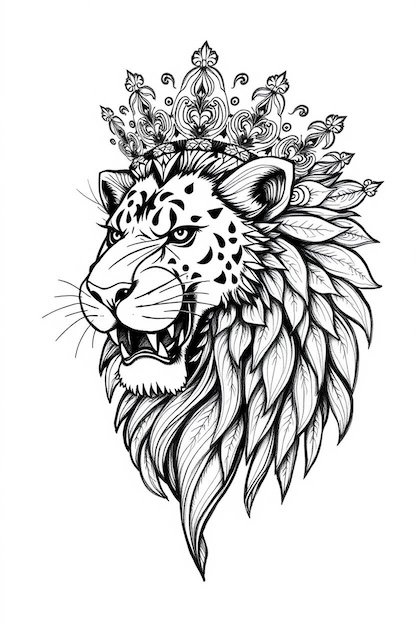
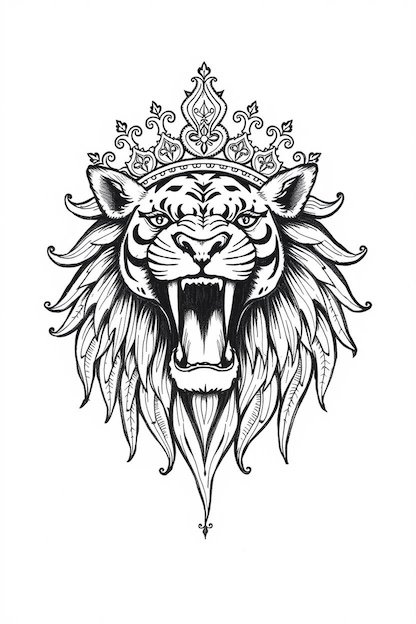
– Lions/Tigers: Symbolizing courage and royal authority, suitable for bold and thematic expressions of power and confidence.
Personal Royal Motifs
Personalized elements can enrich royal mehndi designs uniquely. Incorporating motifs that hold individual significance like a historic royal emblem, favorite fairy-tale element, or custom family symbols makes the design intimately meaningful and creatively personalized.
Royal mehndi is a careful combination of these motifs, each playing a role in creating designs that are both luxurious and culturally significant.
Step-by-Step Tutorials: Intermediate Royal Mehndi Designs
Now that you have explored royal mehndi placements, let’s dive into practical, step-by-step tutorials designed to help you master intermediate-level royal mehndi patterns. These detailed walkthroughs will provide guidance to create intricate designs that showcase the elegance of the royal style.
Regal Mandala (Step-by-Step Tutorial)
The Regal Mandala is a sophisticated, circular design perfect for making your palm or backhand an eye-catching centerpiece. With its intricate patterns and luxurious details, this mandala effortlessly radiates royal charm.
Step 1: Guide Circles
Begin by marking the center of your palm lightly. Draw a small central circle, roughly the size of a coin, which will anchor the mandala.
Step 2: Central Motif
Inside this central circle, sketch a tiny royal element like a crown or a lotus flower, symbolizing purity and nobility. This becomes the focal point.
Step 3: First Ring of Patterns
Surround the central motif with evenly spaced petal-like shapes, such as lotus petals or scallops. Aim for symmetry, ideally 6 to 8 petals.
Step 4: Add Intricate Fillings
Fill each petal with delicate internal patterns—dots, tiny paisleys, or scalloped lines. Add tiny crown shapes or fleur-de-lis between petals for a distinctly royal touch.
Step 5: Second Ring of Patterns
Expand outward by drawing another ring—perhaps small circles, paisleys, or arches connecting the tips of the first-ring petals. This adds depth and complexity.
Step 6: Decorative Outer Edge
Finish your mandala with pointed scallops or triangular shapes around the outer edge, resembling sun rays or a crown’s spikes. Add dots at each point for jewel-like detail.
Step 7: Optional Embellishments
If desired, add complementary patterns like vines or half-mandalas extending toward the fingers or wrist, enhancing the overall royal aesthetic.
Pro Tip: Rotate your hand as you draw, maintaining symmetry. A balanced mandala looks sophisticated and professional.
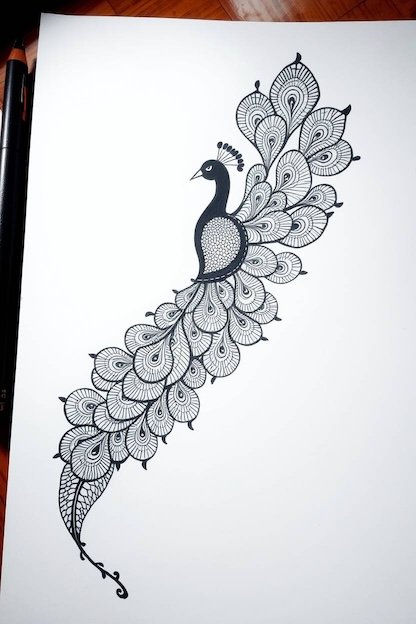
Peacock Elegance (Step-by-Step Tutorial)
The Peacock Elegance design brings royal splendor with its majestic peacock motif. Ideal for forearms, palms, or backs of hands, showcasing your intermediate mehndi skills.
Step 1: Outline the Peacock Shape
Start by drawing an elegant S-shaped neck, topped by an oval head. Sketch a teardrop body at the base of the neck. Position it on the forearm or across the hand diagonally for visual appeal.
Step 2: Sketch Tail Placement
Lightly draw lines radiating outward from the body to represent the fan-like tail feathers. Vary feather lengths for a realistic effect.
Step 3: Head and Neck Details
Add a small eye, beak, and crest feathers atop the head. Decorate the neck with scalloped patterns or diagonal textured lines, resembling feathers. Include an ornate neckpiece at the base of the neck for extra luxury.
Step 4: Body and Wing Patterns
Inside the body, outline a wing shape filled with detailed patterns—paisleys or tiny florals. Contrast this with swirls or mesh patterns filling the rest of the body to highlight intricacy.
Step 5: Tail Feather Design
Create elaborate tail feathers, each an elongated paisley with a detailed “eye” pattern at the tip. Use varied filler patterns like zig-zags, dots, or spirals to enrich the design.
Step 6: Finishing Touches
Refine the tail, adding extra feathers or wisps for fullness. Surround the peacock with floral or paisley flourishes, adding elegance and dimension.
Step 7: Review Symmetry and Flow
Check the design from a distance to ensure an even flow. Adjust feather shapes or body detailing to maintain balanced proportions and elegance.
Pro Tip: Consistent line thickness enhances professional appearance. Outline primary shapes in bolder lines, using finer lines for detailed filling.
Jewelry-Inspired Patterns (Step-by-Step Tutorial)
Jewelry-inspired mehndi looks like elegant royal jewelry such as haathphool (hand chains) and bangles, beautifully decorating your hand like luxurious ornaments.
Step 1: Identify Key “Jewelry” Areas
Mark the wrist (bracelet), back of hand (central medallion), and finger bases (rings) with tiny dots for positioning jewelry elements.
Step 2: Draw the Central Medallion
Create a mandala or brooch-like shape at the center of the back hand. Fill it intricately, resembling a gemstone-studded royal jewel.
Step 3: Create the Wrist Bracelet
Around the wrist, draw a thick ornate bangle pattern or several thin parallel bangles, detailed with mini patterns. Add charm-like motifs hanging from the bracelet.
Step 4: Connect with Chains
Draw elegant, curved lines (chains) decorated with tiny dots or floral loops connecting the wrist bracelet and central medallion, and then from the medallion to the finger rings.
Step 5: Ring Designs on Fingers
On selected fingers, draw ring-like bands around the base, filled with patterns or accented with tiny floral or gemstone motifs. Decorate fingers upwards with paisleys or dots for continuity.
Step 6: Additional Jewelry Details
Add dangling charms from chains and bracelets, like tiny teardrops or bells, enhancing the illusion of luxurious jewelry.
Step 7: Finishing and Finesse
Ensure consistency in patterns, reinforcing main outlines clearly. Slight curves in chains add realism to the jewelry appearance.
Pro Tip: Symmetry enhances elegance; position medallions and chains precisely, though slight curvature is natural and attractive.
With these detailed tutorials, you’re now ready to create stunning intermediate royal mehndi designs. Each design not only adds luxurious adornment but also offers deep cultural significance and a regal aesthetic.
Essential Tools and Ingredients for Royal Mehndi
Creating exquisite Royal Mehndi Designs requires not only artistic skill but also the right tools and premium-quality ingredients. Every intricate detail and lavish pattern is dependent upon using the best materials available. Let’s take a look at exactly what you need to achieve the elegance and sophistication characteristic of royal henna art.
High-Quality Henna Paste
The foundation of exceptional royal mehndi begins with premium henna paste. Fresh, natural henna powder, ideally sourced from Rajasthan, is favored for producing a vibrant, deep, and long-lasting stain. The smooth texture of finely sifted henna powder ensures precise detailing, preventing clogs or uneven application when working on intricate designs.
To achieve the desired dark, maroon-brown color synonymous with royal elegance, you’ll need to prepare your henna paste with the following key ingredients:
- Henna Powder: Fresh, finely sifted henna powder ensures smooth consistency, essential for intricate detailing.
- Lemon Juice or Tea/Coffee: Acidic liquids like lemon juice or brewed tea or coffee help release the natural dye, resulting in a richer stain.
- Sugar: Adding sugar maintains the paste’s moisture, extending the drying time and maximizing dye penetration.
- Essential Oils: Oils like eucalyptus, tea tree, or lavender (terpineol-rich) deepen the stain color, adding aromatic pleasure to the mehndi experience.
The perfect royal paste should have a smooth, creamy texture, neither runny nor overly thick, to facilitate the creation of delicate, precise designs.
Application Tools
Fine, detailed royal mehndi designs require specialized application tools that ensure neat, controlled lines and intricate patterns:
- Henna Cones: Preferred by professionals for their precision, henna cones allow control over line thickness and fluidity. Choose cones with extremely fine tips, especially essential when creating detailed patterns like paisleys, latticework, and delicate floral elements.
- Applicator Bottles with Metal Tips: For artists uncomfortable with cones, jacquard bottles or squeeze bottles fitted with ultra-fine metal tips offer a stable grip, enabling consistent, detailed application. These bottles can be especially helpful in maintaining uniform line widths and ensuring neat execution of geometric or repetitive patterns.
- Toothpicks or Pins: Tiny corrections and finishing touches make all the difference in royal designs. Keep toothpicks or fine pins on hand for minor adjustments. Thin lines, create intricate dot details, or correct minor mistakes before they set.
- Stencils (for Beginners): While most royal designs are traditionally freehand, beginners can benefit from using henna stencils. These provide basic outlines for complicated motifs such as crowns, peacocks, or mandalas, giving you a reliable framework within which to practice detailed fill-ins. Eventually, you’ll graduate to complete freehand techniques, but stencils are a great stepping-stone.
Supporting Materials
Additional supportive materials further elevate the royal mehndi application process, ensuring professional results and ease of execution:
- Sketchbook or Design Reference: Using one of our designs in advance allows for thoughtful arrangement and symmetry, especially useful when placing intricate motifs like peacock tails or portrait figures.
- Citrus Sugar Sealant: Keep lemon-sugar syrup ready (a mixture of lemon juice and sugar). Once your design starts drying, gently dabbing this mixture onto the mehndi keeps the paste adherent and wet longer, significantly enhancing dye release and color depth. This step is indispensable for achieving the luxurious deep brown hues associated with royal mehndi.
- Clean-up Supplies: Have tissues, cotton swabs, and a bowl of water or mild cleanser nearby to quickly clean up mistakes or smudges. Immediate removal of errors ensures your intricate pattern remains flawless.
Quality and Patience
Beyond physical tools, remember the most critical ingredient is patience. Royal mehndi designs are detailed works of art that demand careful planning and meticulous execution, often taking hours. Arrange a comfortable setup with good lighting, a steady table, and comfortable seating to facilitate extended application sessions. Consider having a friend help you, especially if you’re applying your own mehndi.
With patience, high-quality ingredients, precise application tools, and supporting materials, you’ll be ready to craft breathtaking royal mehndi designs that epitomize beauty, intricacy, and sophistication. Your tools and preparation lay the groundwork for art that truly looks and feels regal.
Tips and Techniques for Perfect Royal Mehndi Designs
Creating a perfect royal mehndi design requires patience, precision, and practice. Whether you’re a seasoned artist or a passionate enthusiast eager to elevate your skills, these expert tips and techniques will help you achieve intricate, luxurious results worthy of royalty:
Practice Precision
– Basic Shapes Mastery: Consistently practice fundamental mehndi shapes such as dots, straight and curved lines, paisleys, and petals. Regular practice enhances control and steadiness.
– Tracing Exercises: Use tracing paper over intricate designs to build muscle memory. Repeatedly tracing complex motifs helps perfect line quality and symmetry.
Cone Control Techniques
– Fine-Tipped Cones: Always cut your henna cone with a small, precise opening. A tiny tip ensures thin, controlled lines necessary for royal designs.
– Pressure Variation: Adjust your grip pressure. Use gentle pressure for delicate detailing and slightly heavier pressure for bolder outlines. Practicing pressure modulation gives dimension and depth to your designs.
– Steady Movements: To avoid shaky lines, exhale slowly while drawing long strokes. This breathing technique naturally steadies your hand, resulting in smoother, cleaner lines.
Planning and Layout
– Pre-Design Sketching: Visualize your design layout in advance. If needed, lightly sketch the main outlines or place guide dots using a washable pen or surgical marker for precise positioning. This planning minimizes mistakes.
– Divide into Sections: Mentally segment the hand or body area into manageable sections, allocating specific motifs to each area. This helps maintain balance and ensures every part of the design is meticulously detailed.
Symmetry Hacks
– Guide Dots: For symmetrical patterns (especially mandalas or mirrored motifs), place small guide dots at strategic points before starting. Connecting these dots ensures even spacing and symmetry.
– Mirror Technique: Complete identical or mirrored patterns simultaneously on both hands by drawing one segment on one hand, then replicating immediately on the other to ensure consistency and visual harmony.
Filling and Shading Techniques
– Line Weight Variation: Outline motifs with thicker, defined lines and fill interior spaces with thinner, delicate detailing or dot-work. Contrasting line thicknesses enhance visual interest, creating a striking royal effect.
– Henna Shading: For a dimensional appearance, use gentle feathering motions or dot clusters. Dense dots appear darker, creating shading effects that mimic embroidery, perfect for floral petals or feathers.
Cleanliness and Corrections
– Tip Cleaning: Regularly wipe the henna cone tip with a damp cloth to prevent clogs or unwanted blobs.
– Immediate Corrections: Quickly fix errors using toothpicks, damp cotton swabs, or tissues. Prompt corrections before the henna sets can save your intricate patterns from unsightly smudges.
Drying and Preservation Strategies
– Lemon-Sugar Sealant: Once your design begins to dry, apply a gentle mixture of lemon juice and sugar to rehydrate the henna paste, enhancing color retention and preventing premature flaking.
– Accelerate Drying Safely: Use a fan or hairdryer (cool air setting) at intervals to help designs set faster. This method prevents smudging, particularly beneficial for lengthy designs.
Post-Application Care
– Minimize Movement: After application, keep hands and feet elevated and avoid contact with surfaces to prevent accidental smudging.
– Taping Method: After partial drying, use gentle medical tape or paper tape around fingertips or delicate areas to secure henna and protect against accidental rub-offs, especially overnight.
Creativity and Signature Styles
– Personal Touches: While inspiration from professional designs like ours is beneficial, inject personal creativity. Develop a signature element or style—perhaps always including a specific motif like tiny lotus or peacock feather—to make your designs distinctively yours.
Patience and Mindfulness
– Relaxed Environment: Choose a calm, distraction-free environment. Playing soothing music and taking breaks between extensive designs helps maintain focus and reduce fatigue, ensuring consistently high-quality artistry.
By consistently applying these expert tips and techniques, you can create regal mehndi designs that are both flawless and visually stunning, suitable for any royal celebration.
Mehndi Aftercare: Maximizing Royal Mehndi Stain
Creating a breathtaking royal mehndi design is only half the journey. Ensuring the deepest, richest stain possible is equally essential. A vibrant, long-lasting color enhances the intricate beauty of your design, making it truly fit for royalty. Follow these detailed aftercare tips to maximize your royal mehndi’s intensity and longevity:
Allow Maximum Drying Time
– Minimum Duration: Keep the henna paste on your skin for at least 6-8 hours, ideally overnight. The longer it stays, the deeper and more vibrant your stain will be.
– Protect Your Design: Consider wrapping your henna gently with tissue or loose cotton cloth after the paste has dried slightly to prevent accidental smudging or flaking, especially overnight.
Lemon-Sugar Sealing Technique
– Rehydrate and Seal: As your henna paste starts drying, gently dab a mixture of lemon juice and sugar onto the design with a cotton ball. This helps keep the paste moist, enhances dye release, and prevents premature peeling.
– Application Caution: Be gentle and avoid over-saturating your design. Light dabs are sufficient.
Warmth for a Richer Stain
– Natural Heat: Expose your mehndi design to mild warmth to intensify color. A traditional method is hovering your hands near gently heated cloves on a skillet (not too close to burn) to let the warm clove smoke enhance the stain. Alternatively, simply sitting near a mild heat source helps deepen the color naturally.
Henna Removal Method
– Gentle Removal: When it’s time, gently scrape off the dried paste with the edge of a spoon or credit card. Never wash it off with water immediately as water interrupts the stain’s oxidation process, leading to weaker coloration.
– Post-Removal Wait: Avoid water exposure for at least 12-24 hours after removing the paste, allowing the stain to fully mature.
Natural Oils for Stain Enhancement
– Nourish and Seal: After scraping the henna paste, gently rub a natural oil like mustard oil, coconut oil, or even Vicks VapoRub onto the skin. These oils penetrate the skin to seal in and further darken the henna color while moisturizing the skin.
– Avoid Chemical Products: Refrain from using chemical creams or moisturizers, as these can affect the stain negatively.
Stain Development and Timeline
– Color Progression: Initially, your henna stain will appear bright orange. Don’t panic. This is normal. Over the next 24-48 hours, the stain will darken into deep burgundy or dark brown hues, reaching its peak intensity.
– Timing Your Application: If preparing for special occasions (such as weddings or festivals), apply your henna at least two days in advance to ensure optimal color intensity at the event.
Maintaining Your Mehndi
– Gentle Handling: For the first few days after application, treat your hands gently. Avoid excessive washing, scrubbing, or exposure to chlorine (such as swimming pools), as these can accelerate fading.
– Protective Measures: Wear gloves or cover your hands while doing chores or showering, to prolong the design’s vibrancy and clarity.
Longevity Expectations
– Design Duration: With meticulous aftercare, your royal mehndi design can maintain its vibrancy for one to two weeks, gradually fading to a beautiful, subtle pattern. Proper aftercare ensures the design remains vivid and striking, reflecting the regal artistry it represents.
By diligently following these aftercare guidelines, your royal mehndi design will have a color worthy of royalty, enhancing its intricate beauty and making it the centerpiece of any celebration.
FAQs about Royal Mehndi Designs
Royal mehndi designs captivate many young enthusiasts, but they often have questions about achieving these elaborate patterns. Here are answers to some of the most frequently asked questions, providing clarity and confidence for your mehndi journey:
Q: What makes a mehndi design “royal” as opposed to a regular design?
A: Royal mehndi designs are characterized by their extravagance and intricate detailing. They often feature motifs associated with royalty, like peacocks, elephants, crowns, and lotuses, and typically involve extensive coverage with dense, ornate patterns. Unlike regular designs, royal mehndi creates a luxurious, majestic impression, transforming hands into artwork worthy of royalty.
Q: Do I need a professional artist for a royal mehndi design?
A: Not necessarily. While professional artists can execute complex designs flawlessly, the step-by-step tutorials and techniques provided above equip you to create intermediate royal designs yourself. For special occasions such as weddings, hiring a professional is beneficial. But with practice, patience, and creativity, even beginners can achieve royal-level artistry at home.
Q: How long do royal mehndi designs typically take to apply?
A: Application time varies with complexity and artist expertise. Elaborate bridal-level designs covering hands and arms can take 4-8 hours or more, sometimes spread over multiple sessions. Moderate royal designs, like intricate back-hand patterns, might take around 1-2 hours. Always allocate extra time for detailed work to ensure precision and beauty.
Q: Are royal mehndi designs suitable only for brides, or can I use them for other occasions?
A: Royal mehndi isn’t exclusive to weddings—it’s perfect for any event where you want to feel special, such as festivals, engagements, cultural celebrations, or even casual parties. You can adjust the complexity and scale of the design to match your event. Even grooms and men increasingly opt for bold royal motifs like symbolic crests or geometric patterns, making royal mehndi versatile for everyone.
Q: What if I’m not skilled at drawing? Can I still achieve a royal look?
A: Absolutely! Start by practicing simpler royal motifs, such as paisleys filled with smaller shapes or lotus flowers with detailed outlines. Consistent practice on paper or skin models can significantly enhance your precision, allowing even beginners to create royal-inspired designs with confidence.
Q: Do royal mehndi designs use black henna or other colors?
A: Traditional royal mehndi primarily uses natural henna, resulting in an orange-brown to deep burgundy stain. Occasionally, artists might incorporate temporary alternatives like jagua (natural black dye) or white henna (white body paint) for contrast or modern effects. However, caution is advised: avoid chemically enhanced “black henna” containing harmful substances (like PPD). The true luxury of royal mehndi lies in its intricate patterns rather than color variation alone.
Conclusion
Royal Mehndi Designs beautifully transform traditional henna art into an experience of grandeur and elegance. By focusing on elaborate detailing, sophisticated motifs, and personal touches, anyone can elevate their henna art from simple decoration into opulent, royal masterpieces. Whether it’s an intricate Raja-Rani portrait, a lavish peacock tail design, or elegant jewelry-inspired patterns, royal mehndi designs offer endless possibilities for expressing cultural pride and artistic style.
Encourage Experimentation
As a young enthusiast in India, experimenting with royal mehndi designs provides an exciting opportunity to express yourself during life’s most cherished moments, such as weddings, engagements, festivals, or cultural celebrations. You don’t have to wait for a grand event. Experiment freely during festivals or gatherings, refining your skills and showcasing your creativity. Start small, maybe with a regal finger design or a minimalist yet sophisticated mandala, then gradually build up to more intricate and expansive designs.
Cultural Pride and Personal Style
Embracing royal mehndi is a powerful way to celebrate your cultural heritage while expressing your personal style. By wearing symbolic motifs such as the lotus, peacock, elephant, or intricate paisley patterns, you honor tradition in a modern, stylish way. Each royal mehndi pattern becomes a reflection of your identity, a visual statement connecting you to rich historical and cultural narratives, bringing joy and pride with every glance.
Final Thought – Feel Like Royalty
Ultimately, the magic of royal mehndi lies in how it makes you feel. It’s more than temporary body art. It’s about confidence, celebration, and creativity coming together on your skin. Even as the henna fades, the memories of feeling like royalty will remain, reminding you of the special occasions and joyful moments that royal mehndi helped make unforgettable. Adorning yourself in royal mehndi is about embracing the regal elegance within you, celebrating life’s precious milestones, and feeling like modern-day royalty, even if just for a short while.