

Table of Contents
Introduction
Arabic Mehndi Designs are known for there bold outlines, graceful floral vines, and strategic negative spaces that let your skin show through. It stands apart from other mehndi styles with its distinct aesthetic and simplicity. Whether you’re prepping for an upcoming celebration or just love adorning your hands with henna, this guide will give you plenty of inspiration and expert tips.
I’ll talk about a range of topics like stunning design inspirations, how to choose the perfect style for any occasion, pro application techniques for great results, aftercare secrets for a deep long-lasting stain, the latest trends, and even a step-by-step tutorial to help you create your own Arabic mehndi.
After reading this article and viewing the dozens of Arabic Mehndi Designs included in the article, be sure to go to our home page Mehndi Design Gallery and check out the other mehndi designs we have.
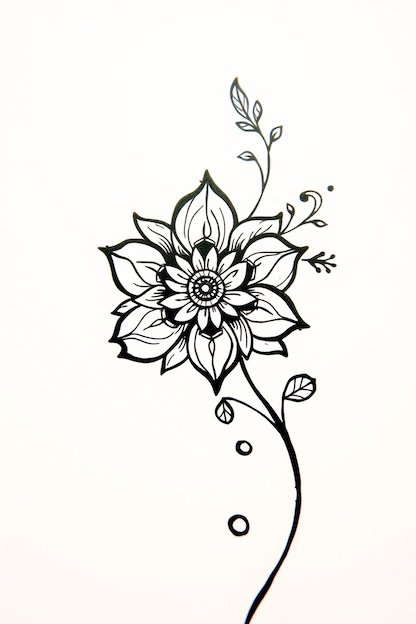
And finally, included throughout the article will be dozens of Arabic Mehndi Designs from our catalog. Click an image to expand it. Print it and use it as-is or use it as inspiration to create your own.
Let’s get started!


Arabic Mehndi History and Culture
Unlike the densely patterned Indian mehndi, traditional Arabic henna was often quickly applied in simpler ways (fingertips dipped in henna or big floral motifs) for brides and guests. Over generations, these motifs evolved into the recognizable Arabic mehndi designs we love today. Designs characterized by flowing lines, bold flower shapes, and plenty of open space to let the skin show through the art.
The designs chosen often reflect local style: Gulf Arab designs (sometimes called Khaleeji style) are known for extremely bold outlines and geometric touches, whereas North African Arabic designs might incorporate intricate Berber patterns. Yet all share the common thread of florals and vine-like trails that define Arabic henna art.
Arabic mehndi designs are common during religious and festive celebrations. Eid mehndi sessions which often favor the Arabic style because it’s quicker to apply than heavy bridal Indian designs, but still looks stunning when you wear your new Eid outfit. The excitement of waking up on Eid morning to see your henna turned a rich brown is something many of us cherish. Similarly, for festivities like Diwali or family events, even though mehndi isn’t originally a Hindu tradition, a lot of young women in India now embrace Arabic mehndi patterns for their sheer beauty and the fun of self-expression.

Arabic mehndi designs represent a beautiful blend of cultural influences from India, the Middle East, and North Africa, but maintain a unique identity. To learn more about the cultural significance of Mehndi, visit Cultural India’s page on Henna/Mehndi, which explores its historical and traditional importance in Indian celebrations.
Arabic Mehndi Design Inspiration
Whether you’re a beginner or a seasoned henna artist, there’s an Arabic design style that will speak to you. In this section, we break down several popular sub-styles of Arabic mehndi designs to spark your imagination. One thing is common among all: the signature Arabic flourish of bold lines, graceful curves, and artistic use of empty space. Let’s explore some of these styles and get inspired!
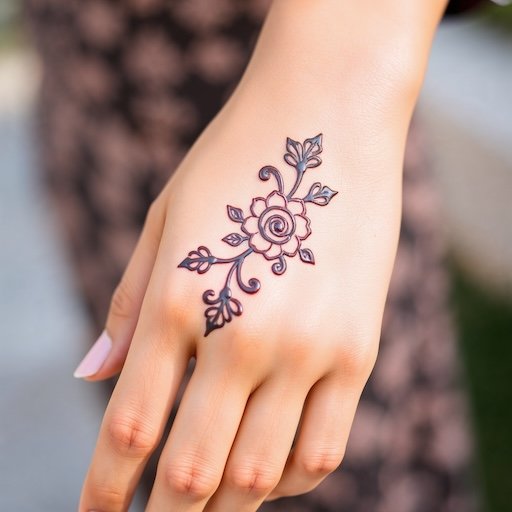
Arabic Rose Mehndi Designs

Floral motifs are at the heart of most mehndi styles, and in Arabic designs, the rose has a special place. Arabic Rose Mehndi Designs are all about featuring the rose as the star of the show. These designs showcase rose blossoms drawn in henna, often with a level of detail and shading that makes them almost come alive. If you’re romantic or just love floral themes, incorporating a rose into your Arabic mehndi can give it a signature look.
Click to see more designs and read a detailed discussion on Arabic Rose Mehndi Designs.
Below are just a few of the Arabic Rose Mehndi Designs from our design gallery. Click on the image to expand the view.


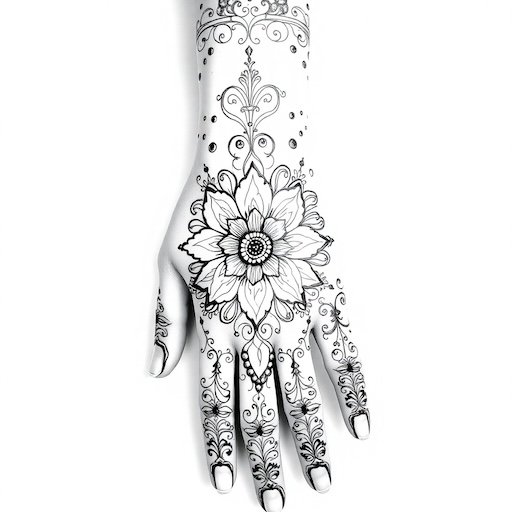
Arabic Full Hand Mehndi Designs

When you want to go all out with henna but still prefer the Arabic aesthetic, Arabic Full Hand Mehndi Designs are the way to go. A full-hand design means covering most or all of your palm or back of the hand (often stretching to the wrist or forearm), but doing so with distinctly Arabic motifs. The challenge here is to create an elaborate look without losing the signature open spaces and bold forms of Arabic style. The result is a breathtaking tapestry on your hands that’s elaborate yet not overwhelmingly dense.
Click to read a detailed discussion on: Arabic Full Hand Mehndi Designs.


Arabic Back Hand Mehndi Designs

Some of the most Instagram-worthy mehndi pictures are of beautifully adorned back hands, fingers elegantly displayed to show off the art. The Arabic Back Hand Mehndi Designs category has its own fan following!
The back of your hand provides a flat canvas that’s perfect for those trailing Arabic patterns. One common design approach is to start from the wrist or side of the hand and let the pattern climb toward one of the fingers (often the index finger or pinky), creating a diagonal cascade. This could be a line of connected flowers and leaves, or a big bloom near the wrist with paisleys and buds reaching up to the finger. The rest of the back hand is often left mostly bare to emphasize the diagonal flow.
Click to read a detailed discussion on: Arabic Back Hand Mehndi Designs.


Arabic Front Hand Mehndi Designs

The front of the hand (your palm and fingers) is the traditional canvas for mehndi in many cultures, and Arabic designs put a fresh spin on it. Arabic Front Hand Mehndi Designs typically position the main elements on the palm while keeping a balance of empty space for comfort and style. Because the palm’s skin stains the darkest, any design you put here will come out bold and rich. Perfect for showcasing Arabic designs.
Any design for the back of the hand can typically be slightly modified for the front of the hand. See the back hand designs in this article for more.


Click to read a detailed discussion on Arabic Front Hand Mehndi Designs.
Arabic Peacock Mehndi Designs
Arabic Mehndi designs have long been celebrated for their striking simplicity and graceful aesthetics, captivating henna enthusiasts around the world. Among the diverse motifs that define this style, the peacock stands out as an iconic symbol cherished for its beauty, elegance, and cultural significance. Peacock-inspired designs are particularly admired for their ability to seamlessly blend traditional Arabic patterns with intricate feather details, creating mesmerizing artwork perfect for weddings, festivals, and modern celebrations.
Peacock Mehndi designs often showcase bold outlines combined with delicate detailing, highlighting the bird’s distinctive tail feathers adorned with graceful swirls and dots. This fusion of bold Arabic elements and intricate peacock symbolism results in an airy yet sophisticated appearance that appeals to both traditionalists and trendsetters alike. Beyond mere aesthetics, these designs hold deep cultural meanings, symbolizing prosperity, grace, and protection, making them especially popular among brides seeking auspicious adornments.
To fully appreciate the artistry and creativity behind these enchanting designs, we’ve created a comprehensive guide that explores everything from historical influences and key design elements to step-by-step tutorials and innovative variations. Click through to discover how you can incorporate the timeless elegance of Arabic Peacock Mehndi into your next henna experience.
Click to read a detailed discussion on Arabic Peacock Mehndi Designs.


How to Choose the Perfect Arabic Mehndi Style
With so many beautiful Arabic mehndi design options choose from, it can be a little overwhelming to decide which one to go for. Don’t worry, choosing the perfect style is part of the fun. It’s all about matching the design to your occasion, personality, and comfort. Here are some key factors to consider when picking an Arabic mehndi design that’s just right for you:
- Occasion and Mood: Think about where you’ll be showing off your henna. Is it a major event like your wedding day or Eid celebration, or something casual like a friend’s birthday party? For big occasions, you might lean towards a more elaborate style (maybe a full-hand design or a detailed Pakistani-Arabic fusion) to match the grandeur. For casual or informal events, a simple Arabic mehndi design or a pretty back-hand pattern might be just enough to make a statement without feeling too heavy. Also consider the mood: a romantic date or Valentine’s event could inspire a rose motif, while a traditional family gathering might call for classic floral vines.
- Personal Style and Preferences: Your mehndi should reflect you. Do you love minimalistic, modern looks? Then those easy, airy designs or a sleek back-hand vine might be for you. If you’re all about traditional elegance, a more intricate pattern with paisleys and lots of detail (like a Pakistani Arabic design) might speak to your heart. Some people love florals and roses, while others might be more into geometric shapes or bold paisleys. Choose designs that you personally find beautiful. When you love the elements, you’ll wear it more confidently.
- Coverage and Placement: Decide how much mehndi you actually want on your skin. Arabic designs can be adapted for minimal coverage (just a side of your hand or only the fingers) or maximum coverage (both sides of your hands up to the wrists). If you don’t like the feel of too much paste on your hands or need to use your hands freely, you might opt for a back-hand design or something that leaves your palms mostly free. On the other hand, if you want that full bridal look, go for the palm plus back and even forearm. Placement matters for style too. For example, front-hand designs are great if you’ll be involved in a ceremony where you show your palms (like exchanging rings or performing rituals), whereas back-hand designs are perfect for flaunting in photos or if you’ll be waving and greeting a lot.
- Time and Skill (Your Own or the Artist’s): If you’re doing the mehndi yourself or having a friend do it, be realistic about the complexity you can manage. Beginners or those short on time should stick to simpler Arabic patterns that still look good but aren’t too difficult (remember those easy designs). If you have access to an experienced mehndi artist and plenty of time, then you can indulge in that intricate full-hand design. The last thing you want is to start a super detailed design and not be able to finish it properly. So match the design complexity with the time and skill available.
There’s no strict rule for choosing a design. The perfect Arabic mehndi style for you will be one that makes you feel happy and confident. When you look at your design and it brings a smile to your face, you know you’ve chosen well. And remember, mehndi is temporary, so you can always experiment with different styles next time. Go with your gut and enjoy the process of selecting (or even sketching) a design that resonates with you.


Arabic Mehndi Application Strategies
Prepare your materials and practice
Great mehndi art begins with good preparation. Make sure you have a quality cone with a fine tip (you can even use two; one with a slightly larger opening for bold outlines and one with a tiny opening for fine details).
Before you start on your skin, it’s wise to practice a bit on paper or a plastic sheet. Draw basic shapes you’ll use in your design like paisleys, flowers, leaves, and swirls. This warms up your hand and gives you confidence. Also, wash the area of your skin where you’ll apply it and dry it well (no lotions, as they can hinder the stain).
Plan the layout (even if roughly)
Arabic designs may look free-flowing, but a little planning is important. Take some time to visualize or lightly sketch (with a very pale cosmetic pencil or even a tiny dot of henna itself) where your main motifs will go. For instance, decide which part of the hand will have the biggest flower or the starting point of the vine.
Having a mental roadmap prevents awkward gaps or overcrowding later. You don’t need to draw the whole thing out. Just mark key spots. If you’re copying one of our designs, note the anchor points (like “big flower near wrist, vine reaching index finger”). If you’re creating on the fly, at least decide the direction of the design (diagonal across the hand? vertical along the arm?).
Master the cone for clean lines
How you hold and squeeze your henna cone makes a huge difference in the outcome. Hold the cone like a pen (or whatever grip feels steady for you), and practice applying consistent pressure so the line comes out evenly.
For bold Arabic outlines, you might press a bit more or cut the tip slightly bigger. For tiny details, use gentle pressure.
A good trick: start squeezing the cone just before touching it to skin to avoid a blob at the beginning of a stroke, and lift off slowly at the end of a line to taper it nicely. Move your hand smoothly; jerky movements can cause wobbles.
If drawing a curve or circle, try rotating the hand you’re working on (or moving around it) so you can pull the cone toward you comfortably, rather than twisting your wrist awkwardly.
Outline first, then detail
With Arabic designs, you often have bold outlines forming the skeleton of the pattern. It’s usually best to apply those first.
Draw the main flowers, paisleys, and vines in their basic shape and placement. Once those outlines are down, go back and add inner details or smaller accents. For example, outline a flower completely, then inside each petal add a thin line or dot while the outline is drying.
Doing outlines first sets the stage and also lets them set a bit, so when you add details adjacent to them, they won’t bleed together. If your design has disconnected elements (say, a flower on one side and another motif elsewhere), finish one before starting the next so you don’t accidentally smudge the first.
Use shading and textures smartly
Arabic mehndi sometimes features cool shading effects or textured fills (like lines or dots) inside motifs. To do a simple shading, draw a second line parallel to the border on one side of a shape (like inside a petal) and fill that small gap with henna, creating a thicker area that appears darker. Or add clusters of dots to fill an area lightly without solid coloring. Dots in descending size can also create a neat shading illusion.
One hallmark of Arabic designs is letting the skin show through. Resist the temptation to keep adding “just one more swirl” everywhere. Those open areas next to a bold motif actually make the design stand out and look elegant. Of course, balance is key. You want enough elements so it doesn’t look too sparse, but also leave breathing room.
By following these strategies – planning your design, controlling your cone, and using an outline-then-detail approach – you’ll find that applying an Arabic mehndi design becomes much easier and gives you beautiful results. If you make a mistake, don’t stress. You can often turn a mistake into a cute extra leaf or dot. So get comfortable and let your creativity flow with the henna!
Arabic Mehndi Aftercare and Color Enhancement
Let it dry thoroughly
After you’ve finished applying your Arabic mehndi design, the first step is patience. Keep your hand still and let the henna paste air dry until it’s no longer wet or shiny. This usually takes about 15-20 minutes, depending on the climate. You’ll notice the paste starting to firm up and crack slightly at the edges when it’s fully dry. Avoid the urge to touch it or flex your hands during this stage. You don’t want to smudge those crisp outlines! If you need to speed things up, you can gently fan your hand or sit in front of a fan.
Seal in the henna (the lemon-sugar hack)
One classic trick to get a darker stain is to apply a lemon-sugar solution to the drying henna.
Mix some lemon juice and sugar (roughly equal parts) and lightly dab it onto the henna paste with a cotton ball once the paste is mostly dry (it should not stick to your finger when touched). The lemon juice keeps the henna moist and helps release more dye, while the sugar makes it sticky so the paste adheres longer. Be gentle. Just a light dab will do.
You don’t want to oversoak and cause the design to run. Your henna will turn a bit glossy as it re-moistens. That’s normal. This step is especially useful if you plan to keep the henna on for many hours or overnight, as it prevents the paste from flaking off too soon.
Keep it on (and warm) as long as possible
The general rule is: the longer you keep the henna paste on your skin, the deeper the color of the stain will be. Aim for at least 4-6 hours; 8 hours or more is great if you can manage.
During this time, warmth helps the henna stain more effectively. If it’s a cool day, sit by a heater or wrap a loose sock or bandage over your hand once the paste is completely dry.
Some henna enthusiasts also pass their hands briefly over the smoke of cloves heated on a pan. (Be very careful if you try this!) The gentle heat and clove oil can help intensify the stain. It’s an old tradition that makes your hands smell lovely and, combined with patience, can yield a richer color.
Removal – don’t wash, scrape
When you’re ready to remove the henna (after you’ve kept it on as long as possible), avoid water. Instead, gently scrape off the dry paste. You can use your fingernails or rub your hands together over a trash can or towel. The dried henna will flake off like little crumbs. If some stubborn bits stick, leave them or rub them off later when they dry completely. Initially, your skin will have an orange or light brown imprint of the design. Don’t worry if it’s lighter than expected – henna stains take time to oxidize and darken.
Post-henna care for a rich color
Now that the paste is off, it’s time to take care of that fresh stain. Avoid water for the next day as much as you can (at least 12 hours). If you did your henna at night, try not to wash that hand until the next morning. Instead of washing, apply a natural oil or balm to your skin – popular choices are coconut oil, mustard oil, or Tiger balm/Vicks (which contain clove oil). These help moisturize the skin and may deepen the color. When you eventually have to touch water, use lukewarm water and mild soap, and pat dry rather than scrubbing. For practical tips on safely applying and removing henna tattoos, check out Healthline’s guide on henna application.
Watch it darken and make it last
Henna stains start orange and gradually turn deep reddish-brown or maroon over 24-48 hours. So don’t judge the color right away. Plan your mehndi timing with this in mind. For example, do it a couple of days before a big event to have the darkest color on the day. To maintain that color, keep the design moisturized. Apply a light layer of oil or lotion after washing hands to slow down natural exfoliation. Also avoid activities that fade henna faster like harsh cleaning chemicals, swimming in chlorinated water, or excessive scrubbing of the design. With good care, an Arabic mehndi design can stay looking beautiful for about a week or more, gradually fading after that.
Latest Arabic Mehndi Trends and Expert Opinions
Henna art isn’t static; it evolves with fashion and personal expression. Arabic mehndi designs, while rooted in tradition, have seen some fresh twists as modern artists and wearers experiment with new ideas. Here are some of the latest trends making waves in the Arabic mehndi scene (and what the experts have to say about them):
- Minimalist Vibes: Less is more, even in henna art. A growing number of young women are opting for ultra-simple Arabic designs like a single botanical vine along one finger and the side of the hand, or just a couple of spaced-out motifs with lots of skin showing through. This minimalist mehndi trend aligns with the overall minimalism in fashion. It gives a chic, contemporary look and is perfect for those who want something subtle. These designs, though simple, require confidence in each stroke since every line is on display.
- Geometric and Modern Motifs: Along with traditional florals, geometric shapes (like triangles, diamond grids, or mandala-esque circles) are finding their way into Arabic designs. You might see a pattern that has a floral vine interwoven with a crisscross lattice, or a bold central piece composed of symmetrical shapes. This brings a modern, edgy feel to the henna. Many artists love this trend because it appeals to brides who want a unique, contemporary twist in their mehndi. It’s like blending a touch of Moroccan geometry with Arabic florals for a fresh outcome.
- Glitter and Glam: A fun trend for weddings and parties is adding glitter or tiny gems to Arabic mehndi designs after the henna has stained. Once your design is complete (and the paste is off), a henna artist might accentuate it by applying skin-safe adhesive and sprinkling cosmetic-grade glitter over certain motifs, or by placing small rhinestones at the center of flowers and along vines. The result is a henna design that literally shines, catching the light and matching your festive outfit. This glitter mehndi is temporary (the glitter/jewels usually last a day or until you wash them off), but it’s a great way to add glamour for a special event. Many professionals recommend this as an add-on for brides who want that extra sparkle without altering the henna itself.

- White Henna Accents: “White henna” isn’t actually henna. It’s a term for a white body paint or adhesive used to create henna-like designs. It has become popular for those looking for a modern twist, especially for events like engagements or photo shoots. For instance, a bride might complement her traditional henna by having a second design done in white on her forearm or as lacey glove-like patterns on the back of her hands. The contrast of a white design against the skin (or even alongside brown henna) is eye-catching and ethereal. It’s perfect for those wearing light-colored or white outfits. Experts advise using only products meant for skin (like white henna body paint) and doing a patch test, since it sits on the surface. White henna typically lasts only until it’s washed off, but it makes a striking statement while it’s there.
- Fusion and Personalization: Arabic mehndi designs are also being personalized more than ever. People are mixing elements from different traditions. For example, an Indian bride might predominantly have Indian-style intricate mehndi but request a few Arabic-style motifs (like big roses or vines) to be woven in, or vice versa. Fusion designs blend the dense intricacy of South Asian patterns with the bold spacing of Arabic ones, creating a unique look. Personal touches are trending too. Brides and grooms initials hidden in the design, small symbols (like a musical note, a favorite flower, or even skylines and portraits for the adventurous) incorporated subtly into the pattern. Top mehndi artists say these custom elements make the henna more meaningful and fun. It turns the design into a story about the wearer. So, don’t be surprised to see henna designs these days that reflect someone’s personality or love story, all while maintaining the beautiful flow of Arabic art.
Overall, the world of Arabic mehndi is buzzing with creativity. Experts agree that while the core of Arabic design remains timeless, there’s plenty of room to play. Whether it’s blending in a new trend or inventing your own, Arabic mehndi continues to be a living art form that adapts to each generation’s tastes. So, don’t hesitate to experiment and maybe even start your own trend with your next henna design!
Step-by-Step Tutorial on Drawing Arabic Mehndi
- Prepare your canvas: Wash your hand and pat it dry. Sit in a comfortable position with good lighting. Keep your henna cone ready (make sure it’s cut to the right size for the lines you want) and maybe a tissue handy to wipe the cone tip. For this tutorial, we’ll draw a simple Arabic floral vine on the back of your hand that goes from your wrist towards your index finger.
- Start with a big flower (the rose): Begin near the base of your thumb (on the back of your hand, close to the wrist). Draw the center of a rose by making a small spiral. This will be the rose’s core. Then draw petals around it: a few curved petal shapes encircling the spiral. Each petal should start and end around the previous one, like layers of a blooming rose. Don’t worry about each petal being identical; part of the charm is the natural look. Now you have an outlined rose as the focal point of your design.
- Add leaves around the flower: From the sides of your rose, draw a couple of leaves to complement it. Leaves are like pointed ovals. Draw a curved line outwards from the rose and back toward it to form a leaf shape. You can add one or two leaves on different sides of the rose. If you like, add a little vein line inside each leaf. This completes your first rose with leaves.
- Extend a vine towards the finger: Now, from that rose motif, extend a curvy vine (a thin wavy line) moving diagonally across the back of your hand toward your index finger. Think of this vine as the “stem” that will carry the rest of the design. Let it snake gracefully; it can have a slight S-shape. Stop the vine roughly at the base of your index finger. Arabic designs often have this kind of diagonal flow, so you’re doing that here.
- Add a secondary motif on the vine: Choose a spot along the vine (about midway) to add another motif for interest. Let’s draw a paisley there. Outline a paisley shape (like a droplet or mango shape curving towards the vine). Once you have the paisley outline, you can decorate inside it with a few dots or a tiny flower shape. This secondary motif adds complexity to the design and fills in the space nicely.
- Decorate the fingertip: Continue the vine (or a small offshoot of it) onto the index finger. You could draw a tiny flower or a cluster of three leaves/buds at the end of the vine on the finger. Some designs simply end with a bold dot or a starburst at the fingertip. The idea is to give the finger a little adornment so the design doesn’t just abruptly stop at the knuckle. Keep it delicate so it complements the main design on the hand.
- Add finishing touches and details: Take a look at your design as a whole. Now add a few finishing touches to balance it. Perhaps place a few small dots trailing along the vine or around the rose. Dots can also be used to outline curves of a motif subtly. If there’s a gap that looks too empty, you can add a tiny leaf, a swirl, or a dot cluster there. You might also draw a thin line inside each rose petal or a couple of curved lines in the paisley to give a hint of shading. The key is to enhance the design without overcrowding it. Step back and ensure there’s still some open space around your motifs.
- Let it dry and admire your work: Your Arabic mehndi design is complete! Now, sit back and allow the henna to dry completely (remember our aftercare tips: it needs time to set for a rich color). As it dries, you’ll see it turning flaky and the color of the paste darkening. Resist the urge to move or touch it. Once dry, you can follow the aftercare steps discussed above (like the lemon-sugar dab and keeping it on for several hours) to get the best stain. Enjoy the beautiful design you’ve created and the compliments that are sure to come!
Conclusion
Arabic mehndi designs captivate us with their effortless beauty and cultural richness. From festive Eid gatherings to dreamy weddings, these henna patterns have a way of bringing joy and elegance to every occasion. We’ve journeyed through the facets of Arabic mehndi – learning about its roots, soaking in design inspirations, picking up application tips, and even drawing a design step by step. By now, you should feel equipped and excited to adorn your own hands with this art form.
Remember, the charm of Arabic mehndi lies in its versatility and the personal touch you give it. Whether you prefer a simple vine on your wrist or an elaborate full-hand composition, let your creativity shine. Don’t be afraid to mix and match ideas, play with new trends, or develop your signature motif. Henna is a temporary art, but the memories of donning a beautiful design (and the compliments you get!) will stick around.
Most importantly, enjoy the process. There’s something almost meditative about applying mehndi. The smell of the henna, the drying ritual, and the anticipation of seeing that rich color bloom on your skin. It’s a connection to centuries of tradition and at the same time a very personal expression. So the next time you have a celebration coming up or even if you’re just in the mood for some self-love, roll out your henna cone and let those Arabic mehndi designs transform your hands into a work of art.